

Today I'm posting a tutorial for the quilt I showed you yesterday: Abacus. This baby quilt is a great project for a beginner, and it's a quick option when you need a last minute gift. For this quilt you will need:
- 20 charm squares for the "beads"
- 8 solid charm squares for the "sliders"
- 7 strips of white fabric for sashing; mine were 3 x 33 inches, but you can adjust this if you like
- approximately 1 yard of coordinating fabric for backing
- approximately 1/3 yard of coordinating fabric for binding
- matching thread
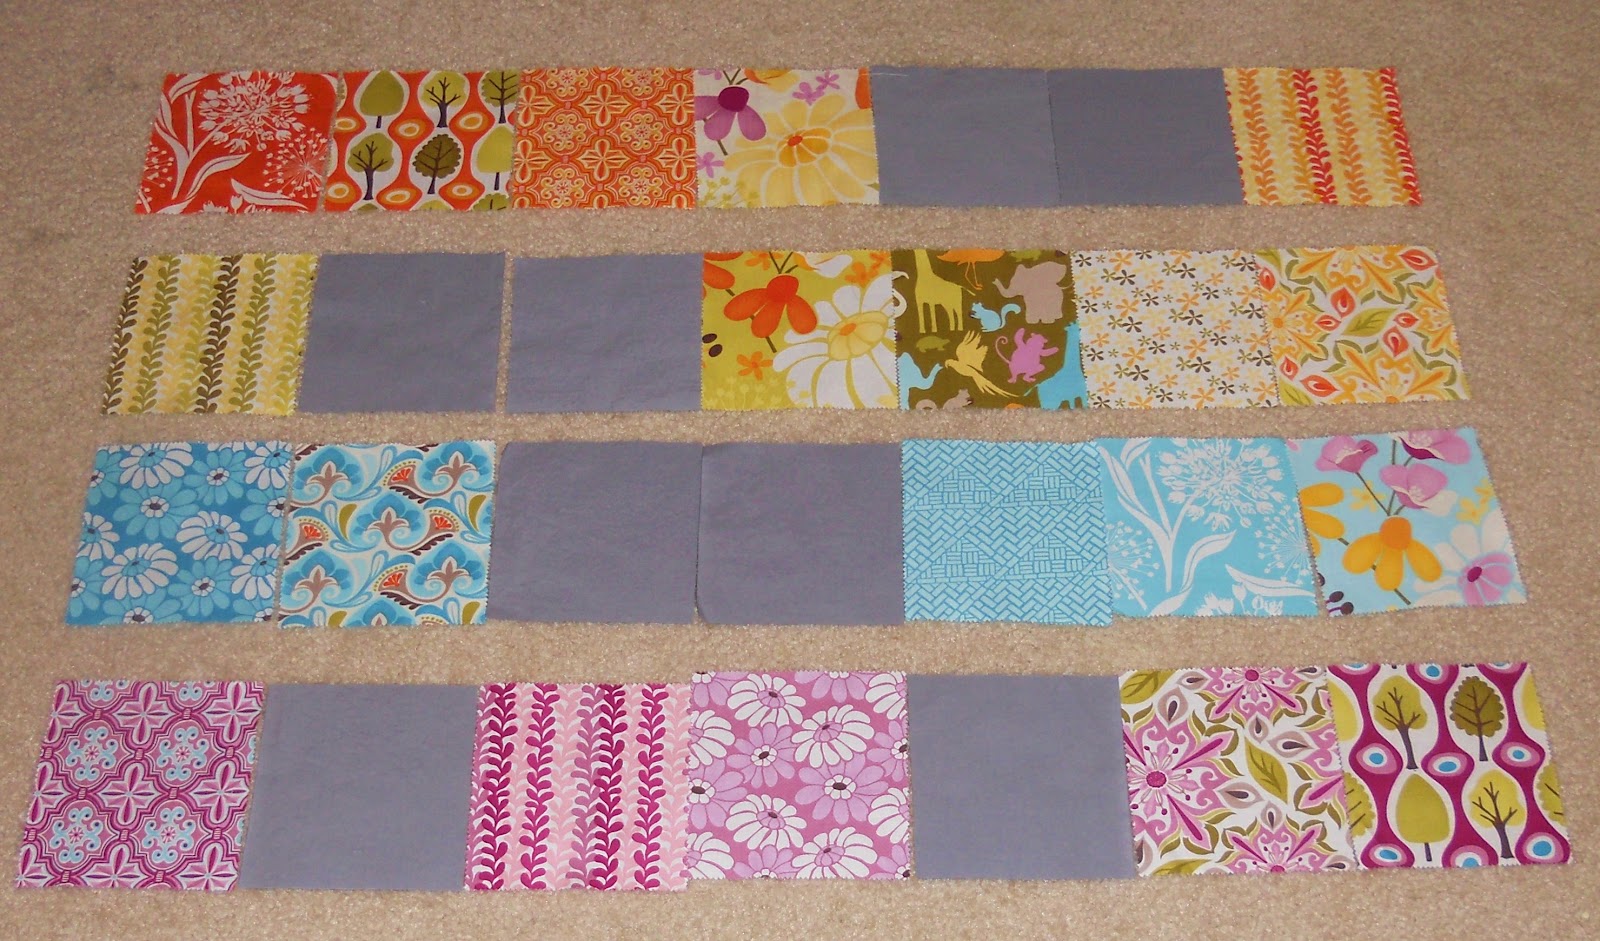
Start by arranging the layout of your charm squares in four rows, each having five beads and two sliders. I played with this quite a bit before deciding on my final layout. While I ended up putting each pair of solid charm squares together for ease of quilting later on, you could separate them if you like as you see in the picture above.

Sew each row of charm squares together. I used a quarter inch seam allowance for all of my sewing in this project, by the way. Press your seams in one direction along each row.

Once your rows are set, add your sashing between each of the rows. I attached one row to one piece of sashing until I had three pairs and one last charm square row; then I went back and sewed all of the pairs together. This helps me keep things a little straighter. Press your seams in one direction as you go.

Now add the outer border. Sew a strip of sashing onto the top and bottom of your quilt top, then add another strip to each right and left side. Continue to press those seams.


The easiest way to add a backing to your quilt is to make it all one piece of fabric. I would have used one piece of Central Park print for mine if I had one, but instead I sewed white fabric on either side of my one quarter yard strip of print that I had on hand. Use your own creativity to make this the way you want it, but do be sure that your backing is a little larger than the quilt top on all sides to make up for any shifting that happens during quilting. There's nothing worse than finishing your quilting and realizing that your backing is a little short around the edges.

Make your quilt sandwich. Lay your quilt backing right side down and top it with your batting and then your quilt top, right side up. I use regular straight pins for this, but many people have other options. I like to start in the center and work my way out to smooth out any excess fabric as I go.

For the quilting, I stitched in the ditch along the edge of every single charm square row. I then stitched along the border between each of the printed charm squares as well as stitching a border just a quarter inch inside each printed charm square.
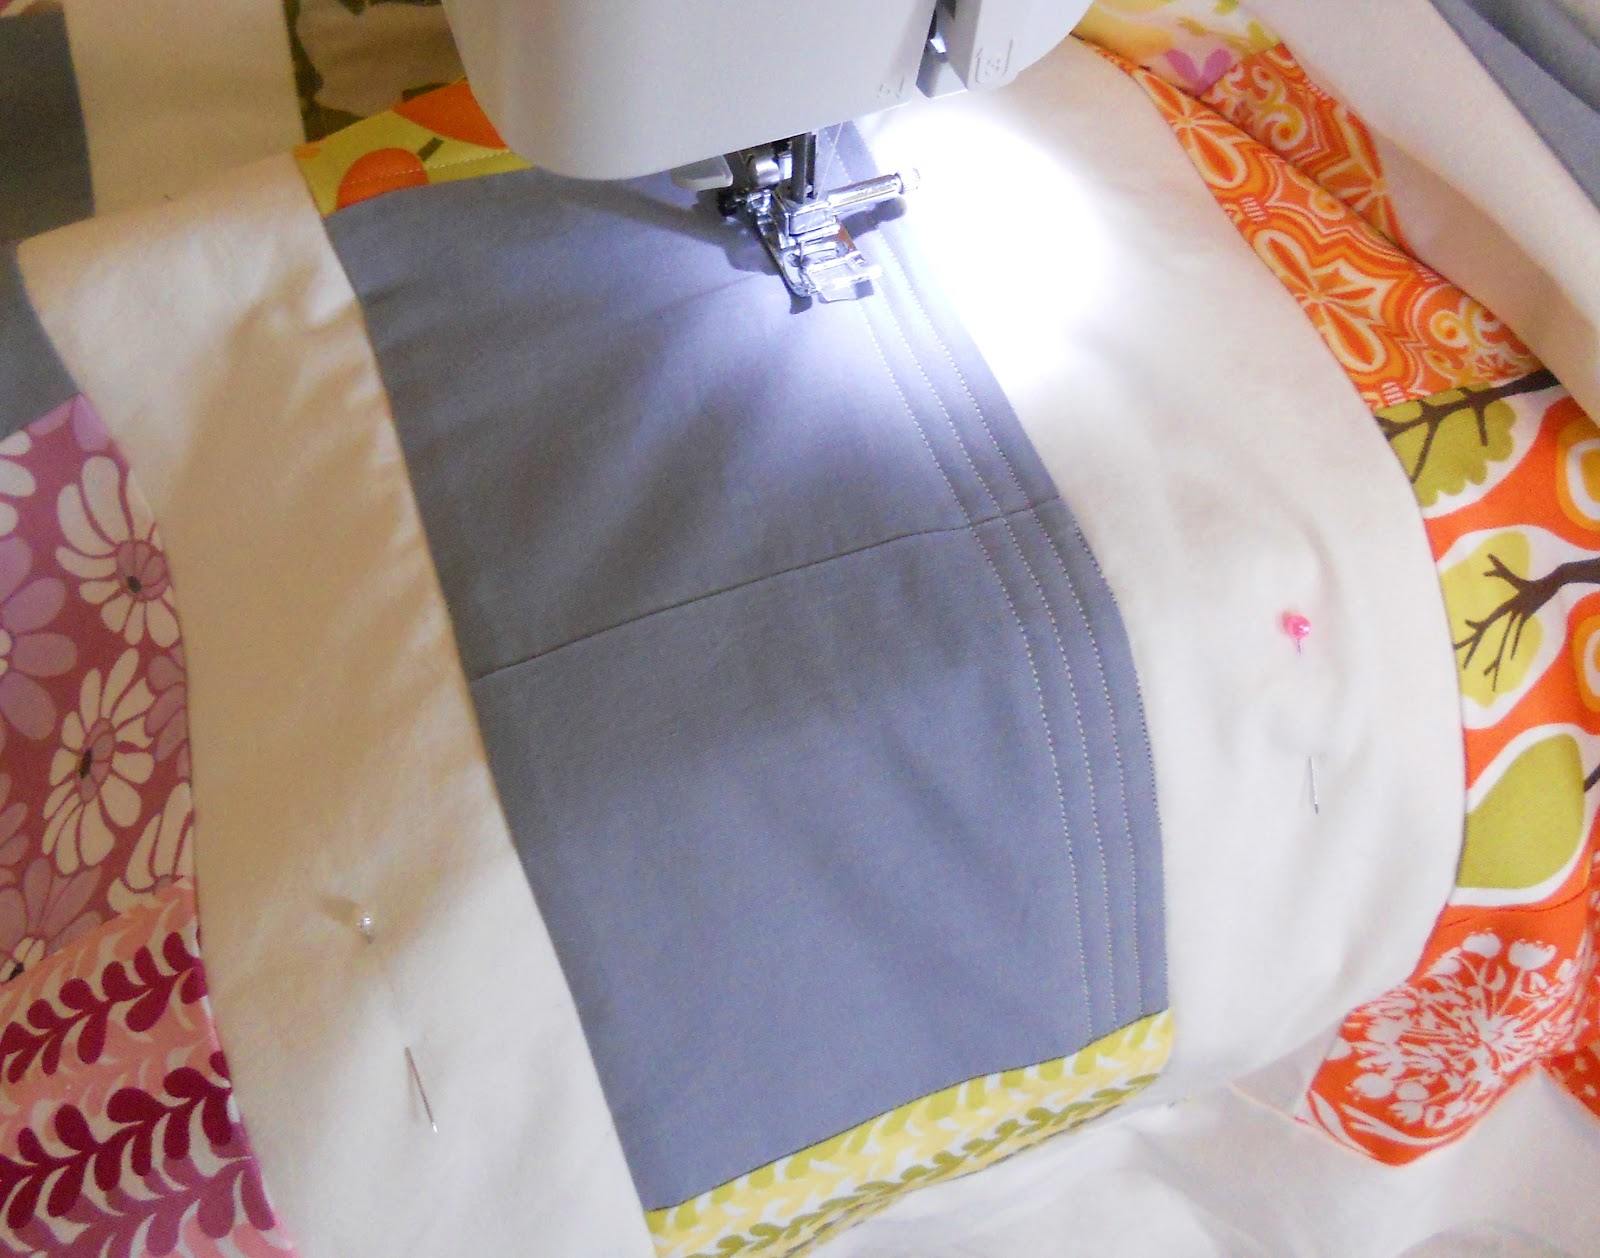
For the solid slider squares, I stitched horizontally in rows a quarter inch apart all along the inside. Refer to the pictures for clarification on this.

Once you have finished quilting, remove any leftover pins and trim the edges of the batting and backing so that they match up with the edges of the quilt top.

All you have left is the binding. If you are unfamiliar with how to make and attach your own binding, I refer you to Elizabeth Hartman's wonderful tutorial. I usually use straight grain binding. It has held up very well for my projects so far.
And that's it! Please let me know if this tutorial is helpful to you or if you find any glitches in it. I'm hoping to add more tutorials in the near future. Enjoy!
Thank you So much! Great project and clear instructions! Now for a laugh...I started this comment with 'I love that background fabric in picture..." and I moved back up to see what number it was.Apparently *I* love your ironing board cover...LOL
ReplyDeleteJust found you via "Sew Can She" What a great tutorial, I will definitely be trying one of these :)
ReplyDeletethis is such a cute quilt! what a great idea and I love your colors!
ReplyDeleteI love this and it is soooo on my to do list! Thanks for the tutorial - it is very well written xx
ReplyDeleteThis is a such a beautiful little quilt for a baby, or a little larger for a child. I love making smaller quilts for kids and see them light up when they receive them. One thing that I noticed while reading your tutorial was that Elizabeth Hartman's "Binding" tutorial is no longer available. I thought that you would want to know.
ReplyDelete