Showing posts with label design. Show all posts

Monday, April 11, 2016

7 Tips for Planning Your Next Project

7 Tips for Planning Your Next Project by Heidi Staples of Fabric Mutt

Every project has to start somewhere. The time spent planning your next work of art is arguably the most important part of the creative process. This is where you’ll decide what you want to make, why you’re making it, and how you’ll do it. Here are seven ideas for getting the most out of your next sewing project design session...

1. Have a resource library.

Whether you design your own projects or enjoy working from ready made patterns, it helps to have a library full of ideas to get you started. This can include books, magazines, patterns, blogs, websites, online idea boards, or a set of bookmarks on your computer. Having these resources at hand helps me when…
  • I want a pattern that’s ready to go quickly.
  • I need help with a specific technique.
  • I’m stuck for ideas and need inspiration.

Keep in mind that you don’t have to limit yourself to sewing publications. I’m tremendously inspired by works about interior decorating, travel, architecture, fashion, general crafting, and vintage design. You are the curator of your library, so choose items that are important, useful, and meaningful to you.

7 Tips for Planning Your Next Project by Heidi Staples of Fabric Mutt

2. Be a librarian.

Have a system for keeping your print items in order. Bookshelves are the most obvious solution for stashing your books and magazines, but wooden crates, heavy wire bins, and magazine files work too. I use all of the above options for different types of publications.

Patterns are also a part of your library, and there are plenty of ways to organize them. Keep each one in a separate file folder, school portfolio, manilla envelope, or clear plastic bag. Any of these options will fit neatly inside a wire basket or file box, where they’ll be ready when you need them.

3. Know what you like.

When you’re deciding what to sew next, be honest with yourself about what you like to make. We all have projects in our past that we started for some reason but abandoned because they just didn’t work for us. When this happens a lot, it can be frustrating to see that stack of unfinished projects.

The longer you sew, the more you’ll know what kind of projects you do best, and this will help you be both practical and thoughtful when choosing a project. Also remember that your tastes are going to change over time. The artist you are today is not the one you were even a year ago. You may find that projects, quilting styles, fabrics, or colors that once excited you, now seem to have lost their appeal. This is completely normal. Sometimes you’ll be surprised to find yourself falling in love with those items all over again later on, but if not, you can always pass them on to others who will be happy to give them a new home. Just remember that there’s no greater waste than investing time in projects you don’t love just because you think you’re supposed to.

4. Stretch yourself.

Don’t be afraid to try something new once in a while. This is how you grow. I’ve found that many things I was once afraid to try (zippers, bags, hexagons) became favorite projects, many of which opened up great opportunities for me. And even if you don’t end up loving that new technique, you’ve still gained valuable experience.


5. Stock an art station.

Keep a set of art supplies on hand so that you can capture ideas when you think of them. My workspace is always stocked with pencils, erasers, colored pencils, a ruler, graph paper, and unlined paper. I can’t tell you how many times I’ve run to my desk so that I can sketch out a design before it disappears from my head. Having these materials nearby is so helpful when inspiration strikes.
7 Tips for Planning Your Next Project by Heidi Staples of Fabric Mutt

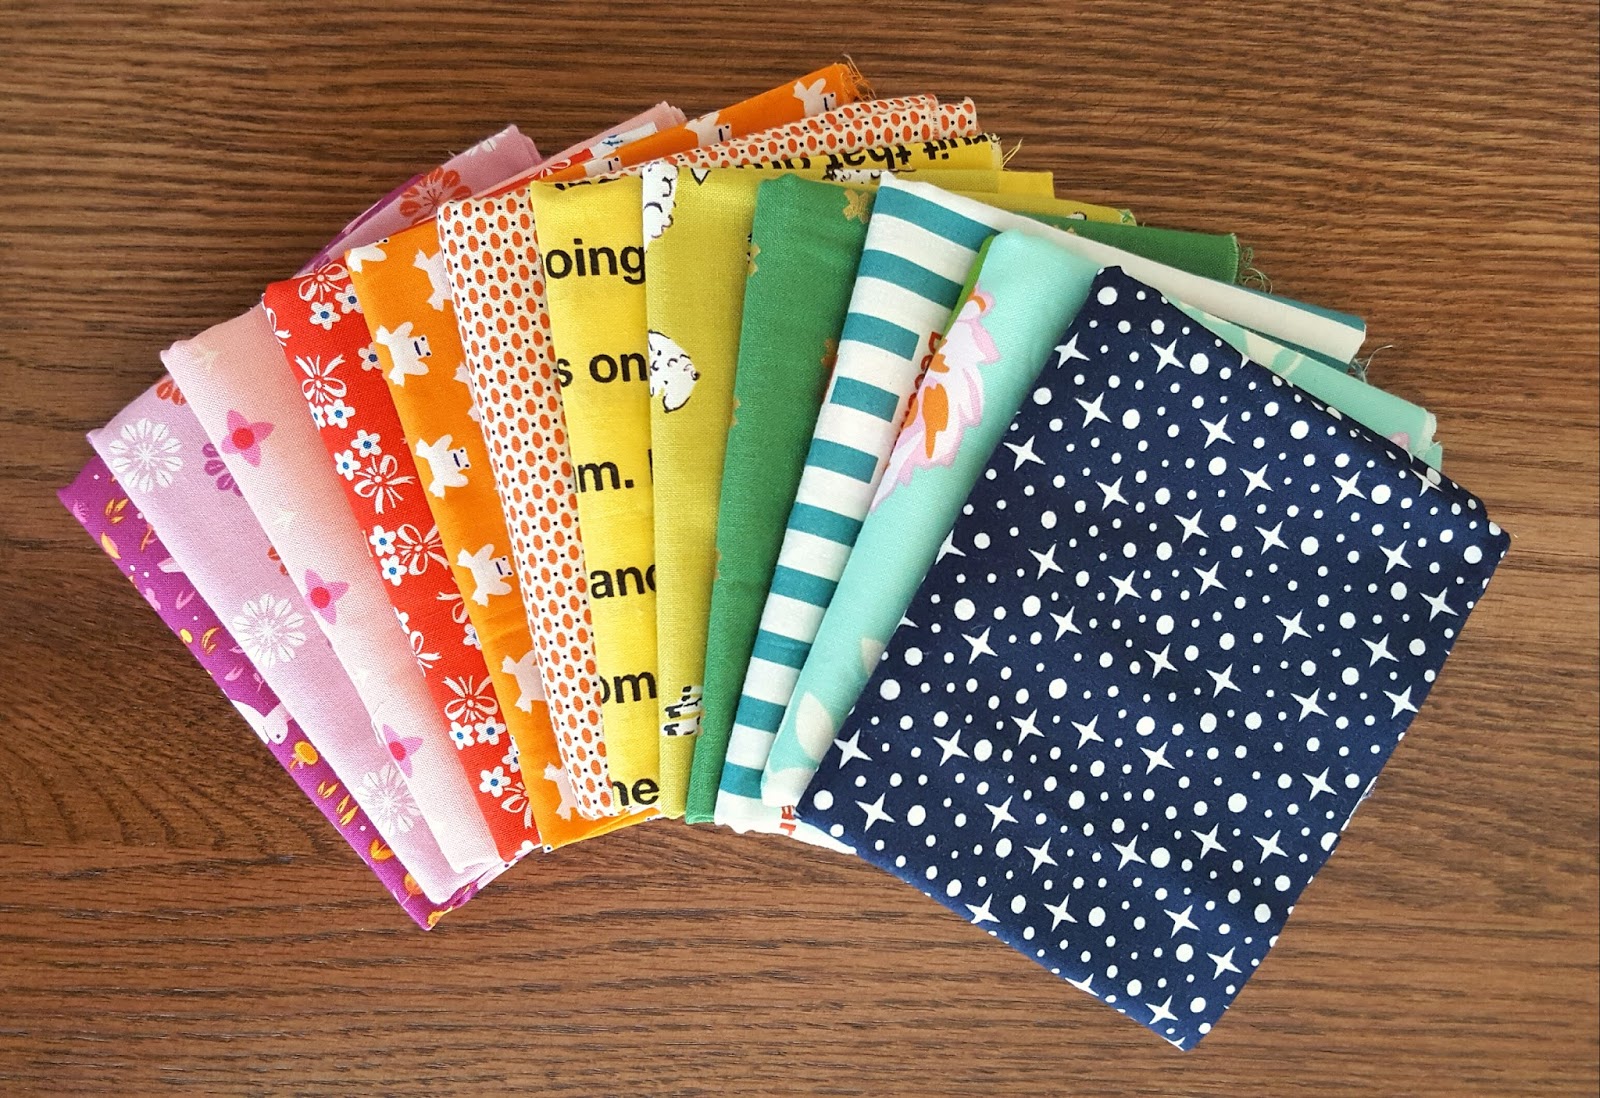
6. Choose your fabrics thoughtfully.

Are you going for a wild and crazy mix of prints and colors? Is this project for a child or an adult? Should you stick to a color palette? Having all these questions settled in your mind before you start pulling the fabric out of your cabinet will keep you focused when you're making decisions later on.

Also remember that if you don’t love it now, you won’t love it later. This applies to pretty much everything in the sewing process, including the prints you choose. Don’t start sewing until you love the fabric stack in front of you. Too often I've ignored that little voice in my head that said, "I'm not sure I like this" and lived to regret it...every single time.

7. Practice.

Scientist Linus Pauling once said, "The best way to have a good idea is to have a lot of ideas." It's so true. Designing projects, choosing winning fabric combinations -- these things take time and practice. The more you do it, the more you'll feel comfortable with what you like. Keep practicing every week and, if possible, keep a record of your work through a notebook, blog, or social media account. When you look back over that creative journey, you'll be surprised at how far you've come.

How do you choose your sewing projects? Do you prefer to work with ready made patterns, do you like designing your own, or a little of both? Any tips for the design table?

Friday, February 12, 2016

The Sewing Notebook

Sewing Notebook by Heidi Staples of Fabric Mutt

One of the best habits I’ve picked up is to keep a sewing notebook. This is a place where I can chase rabbit trails, make mistakes, and talk about my creative passions without worrying about how they look to the rest of the world. Your notebook can take any form: a spiral notebook (with lines or graph paper), a mini or full size binder, even a document on your computer. I can’t stress how important it is to pick the one that feels most comfortable when you write in it. If you like, make a pretty cover for your notebook, like my design above which always reminds me of party invitations. Washi tape, colored pens, scrapbooking stickers, cute paper clips -- these goodies can make things lots of fun, but they’re not absolutely necessary. Mine is divided into the following sections:
  • Must Make List: a running list of projects that I want to sew
  • Project Ideas: notes and sketches for new projects
  • Inspiration: my own little scrapbook for anything that inspires me -- magazine pictures, cards, photos, paint chips, etc.
  • Class Notes: all my notes from online or in-person classes on sewing, quilting, and design
  • Creative Journal: thoughts about my creative process and journey (I'll share more about this in a future post.)
  • Fabric Designs: ideas for fabric designs or possible collections -- just for fun!

Sewing Notebook by Heidi Staples of Fabric Mutt

You can easily add sections for your blog, guild meetings, sewing retreats, shopping lists, swap projects, or even your sewing calendar (see my book, Sew Organized for the Busy Girl, for more on that). This notebook can be whatever you want it to be, and it can always change to fit your needs as you go along. I actually keep two sewing notebooks right now. One is a mini binder full of notebook paper which I usually take with me to events, and the other is a slim hardbound book full of graph paper that I use most often at home. As someone who used to have loose notes and sketches floating all over the house, I can't tell you how helpful it is to know that all my work is now organized and easy to find when I need it!

Sewing Notebook by Heidi Staples of Fabric Mutt

In the past, I've tried to have inspiration scrapbooks or journals, but I've gotten hung up on wanting them to be pretty and perfect. There's nothing wrong with pretty, but perfect will do you in every time. The whole point of the sewing notebook is having a place where mistakes don’t matter and where you have room to think and grow. Don’t cheat yourself out of that gift by trying to get everything “right.” No one ever has to see the inside of this book except you. Let it be a place where you always feel safe to be yourself.

Sunday, November 8, 2015

Favorite Things

Melody Miller Retro Nine Patch Quilt by Heidi Staples for Fabric Mutt

The longer I quilt, the more I know what I like. A whole lot of my favorite things ended up being part of this retro nine-patch quilt, things like...

Melody Miller Retro Nine Patch Quilt by Heidi Staples for Fabric Mutt

1. Melody Miller's fabric -- This designer can do no wrong in my eyes. She has a genius for walking the classy line between vintage and modern. I alternated 6" squares with the nine-patch blocks, perfect for featuring the large prints in her early Ruby Star collections. I love that both the designs as well as the mix of bright and subdued colors give this quilt a lovely retro feel.

Melody Miller Retro Nine Patch Quilt by Heidi Staples for Fabric Mutt

2. Linen sashing -- I'm madly in love with the contrast of yarn dyed linen against quilting cotton. It just looks fabulous every...single...time.

Melody Miller Retro Nine Patch Quilt by Heidi Staples for Fabric Mutt

3. Double gauze backing -- Wanna feel like a cozy little newborn baby swaddled in your favorite blankie? Use this stuff on the back of your next quilt. It gets softer each time you wash it and can be found in plenty of modern designs like this cheerful aqua version by Cotton + Steel.

Melody Miller Retro Nine Patch Quilt by Heidi Staples for Fabric Mutt

4. Colorful binding -- I discovered a little secret last spring about Melody's wildly popular viewfinder reels: they make an incredible binding. This is the second quilt I've bound in this print, and there will definitely be more.

The best part of making a project out of your favorite fabrics? You have a whole lot of fun while you sew.

And yeah, you're pretty fond of that finished quilt too...

Monday, May 11, 2015

Market Case

Market Case by Heidi Staples of Fabric Mutt

Over the past few years of sewing, I've discovered a little quirk about myself: I rarely sew the same thing twice. Most of the projects you see in my book were a one-time deal -- the first time I made it was the only time. The same is true of my tutorials. For instance, I adore the Ellie Travel Case and have loved seeing all the creative versions of this little bag popping up on Instagram lately, but would you believe that I don't actually own one myself? I made a single bag for the tutorial which I then gave away as a birthday present. One of these days I need to make another for myself, but there just always seems to be something else on my list of things to sew that comes first. I guess that's why it sometimes takes me longer than expected to finish a project that I'm creating from scratch. Rather than make a prototype, adjust details, and then keep remaking the project until I get what I want, I usually spend a ton of time processing those details on paper and in my head so that I can do it right the first time. At least 75% of the time, it seems to work out okay...so far, anyway.


Over a month ago, I decided to make a new bag to take with me to Spring Quilt Market this week, but my idea of what that bag should look like must have changed at least a dozen times. I wanted something that had only zipper closures so that nothing would fall out and get lost while I was traveling. It needed to be small enough to use as a purse, but large enough to carry everything I wanted to take with me on the plane. I had originally planned to make a crossbody style bag, but due to some recent neck pain from hauling around too much in my everyday purse, I decided to go with shorter handles instead. After weeks of tinkering with the pattern, here's the result: my Market Case.


The front pocket is made of a hexagon panel that I sewed by hand, and I adore the way it looks with chocolate brown yarn dyed linen from Robert Kaufman. The front pocket and main interior are lined with prints from the new Natural History collection by Lizzy House. Those butterflies are a personal favorite of mine. I added an inner pocket made from the linen as well, knowing how handy those can be. Since I was running out of time, I decided to do a zig zag stitch along the inner seams rather than bind them. I've found that I really don't mind the look of seams finished this way, and it takes less than half the time which, to me, is more than worth it.


I am completely delighted with how this bag turned out. It's exactly what I needed -- even if it wasn't what I first envisioned. And if you happen to spot it while you're walking the floor at Quilt Market, please come over to say hi! Since every bag needs a buddy, I made a rainbow badge holder using Monica's brilliant pattern to go along with it. It's so good to have these projects finished and ready to go in time!

For those of you going to Quilt Market, I'll be doing a Schoolhouse session on Thursday at 1pm in room 211B and signing books at the C&T Publishing Booth (#1440) on Friday at 4pm. You can follow me on Instagram at @fabricmutt too where I'll be posting often. I'll only be at Market for those two days, but I'd love to see as many of you as possible while I'm there!

Sunday, August 17, 2014

Around the World Blog Hop


My sweet and talented friend Sarah of Berry Barn Designs was kind enough to ask me to be one of the next stops on the Around the World Blog Hop, a chance for artists of all kinds to talk about how they approach the creative process. Consider this your own free backstage pass to what goes on here at Fabric Mutt...

Look for the Craft Book Month Blog Hop and Quilter's Mixology Blog Hop, both coming in September!

What am I working on?

I've been a busy girl lately, trying to stay ahead of upcoming deadlines. At the moment I'm scheduled to be in four different blog hops next month, and that means a lot of sewing! Two of my projects come from the brilliant books you see above, both of which I highly recommend to you. I'm planning to write up a tutorial for my Tiger Tracks Satchel, and I have a few fun little projects on my "when I have time" list. I've also put in a bit of work on my book which is heading into the final editing stages this fall before it's released in the spring. I can hardly wait to share it with you!

How does my work differ from others in its genre?

I'm the queen of the quick finish! When I'm trying to juggle housework, homeschooling our three girls, sewing deadlines, family activities, and daily errands, there's nothing more valuable to me than a project that I can make in a day or two. When I can work on something a little more complex, it's always a treat, but I've learned to make peace with the reality of my time limits for now.

Inspiration is everywhere! Right now I'm loving the colors and graphic design elements in this row of old books that are sitting on the top shelf of my desk.

Why do I create what I do?

It's so interesting to look back on how my work has changed over the past few years. There are always going to be new patterns, designers, and color schemes that influence what I'm doing. I spend a good amount of time each month looking at design trends in a number of areas besides sewing -- fashion, graphic design, interior decorating -- and it's been a great learning process for me. I've seen my tastes swing back and forth between modern and traditional, landing somewhere in the middle. I've also really come to value simplicity in design.  I've said it before, and I'll say it again -- there's nothing more important than to make what you love. I think it's great to challenge yourself every now and again by trying something new, but it's a mistake to try to be something you aren't. The longer I sew, the more clearly I understand what I really love to make and the less likely I am to jump on a bandwagon that isn't for me. Of course, I can still appreciate the talent and thought that have gone into a project, even if it isn't something I would make myself. That's the beauty of this online creative community. Mostly I'm just incredibly grateful to have the chance to not only sew projects that make my heart sing, but to share them with people who care to hear about them. This blog has been one of the most amazing experiences of my life.

1. Patchwork Pouch, 2. Everyday Party Quilt, 3. Plain & Fancy Mini Quilt, 4. Katie Jump Rope Pillow, 5. Summer, 6. Nursery Versery Apron

How does my creative process work?

It depends on what I'm making. I've become really interested in how bags and other accessories are put together. I love to walk through the purse section of a department store and spend time looking at seams and taking photographs of interesting shapes. I'm sure the salespeople think I'm crazy, but I find it absolutely fascinating. I always get ideas for things I'd like to experiment with in bag patterns of my own.

I often sit down with graph paper and colored pencils to sketch out ideas before I start sewing, but sometimes I just throw all caution to the wind and start working without a definite plan in mind. I usually make notes when I'm creating a new pattern so that I can recreate the project if I want to write up a tutorial later on. Of course, once in a while -- say in the case of a certain previously mentioned satchel -- I get too excited and don't stop to write down measurements...

Heather Ross fabric is always a good idea...

When it comes to quilts, there are projects that I make to showcase fabric, and then there are fabrics I use because they let the pattern shine. I'm a stickler for getting things just right when it comes to design elements in any project I make. I'm not devastated if a pair of blocks don't match up perfectly or if my seams aren't pressed exactly right, but if I choose the wrong print for a quilt binding, it's going to haunt me every time I look at it. I probably spend more time on project design than on anything else, but I don't mind because it's definitely my favorite part of the process.

One of my current "little projects" in process -- a box bag featuring Denyse Schmidt's fantastic new Hadley collection

I hope you've enjoyed a little peek behind the curtain at how my creativity works. I've asked two of my oldest and dearest blogging friends to share with you next Monday. Beth is the amazing woman behind Plum and June, a blog which has done so much to promote and connect new sewing bloggers all over the world with her annual New Quilt Blogger Blog Hop. She always inspires me with her fearless sewing and her incredibly stunning photography (just look at this post to see what I mean). Becca writes a lovely, witty journal of her sewing adventures at Bryan House Quilts. She has a great eye for color and more patience with half square triangles than I will ever have. Mostly, though, I just desperately want her Nikki Tote Bag. Both of these ladies have been a huge encouragement to me in my own sewing journey, and I can't wait to see what the year ahead holds for them.

Thanks so much for stopping by!

Sunday, July 13, 2014

The Lucy Bag


I've said it before, and I'll say it again: what I love most about sewing is the ability to make anything you want and to make it exactly the way you want it. Take my latest finish, the Lucy Bag...


My sister Amy is going on vacation this week and asked if I could sew a bag for her to use on the trip. We talked about ideas, and she drew me a few sketches to work from. I asked what kind of fabric she liked; she pointed to my recent patchwork mini iPad case and said, "Something like that...I love that." I pulled fabrics, started sewing, and emailed her photos to get approval on details as I went along.


The bag features a front zip pocket, a large inner pocket, a small inner zipper pouch with a detachable ring, and a crossbody strap which can also be removed if desired. The main body measures 9 1/2 x 12 1/2" and is about 2" deep, making it large enough to hold a few necessities without becoming easily overloaded. I used black and white linen Mochi Dots for the exterior, while the bag is lined in a bright print by Denyse Schmidt which my sister absolutely loves.

And the result is one sweet little bag, reminding me that collaboration really can be a beautiful thing.
Related Posts Plugin for WordPress, Blogger...