Showing posts with label quilt. Show all posts

Monday, June 26, 2023

Giddy

Greek Cross Quilt by Heidi Staples of Fabric Mutt

My girls came home on Saturday, giddy and exhausted after almost a week of having all kinds of fun at church camp. It was the first time all three of them had been away from me at once, and I honestly wasn't sure how I was going to deal with it. After more than sixteen years of motherhood, I'm a little out of practice at living life without kids around. But having enjoyed a quiet week of dinner dates, shopping trips, swimming, sewing, and long conversations with James and my parents, I feel like I've been given such a gift. I can appreciate all the joys of motherhood right now, enjoy watching my girls grow in confidence and independence, and know that there will still be a wonderful life waiting for me when they leave the nest someday. It's like getting a small glimpse of the future while still being so thankful for today. 

Greek Cross Quilt by Heidi Staples of Fabric Mutt

But truly, the sewing was fantastic this week -- hours all by myself in the loft finishing my Greek Cross quilt top while simultaneously starting another quilt that I designed years ago for my unrealized Carnival of Patchwork book. I sewed more in the last six days than I have in the last six months. Small projects have always been my specialty because that's usually all I have time for, and to some extent, I didn't have the patience or attention span for large quilts. But now I can really see the pleasure of working on extended projects. 

Greek Cross Quilt by Heidi Staples of Fabric Mutt

I'd like to think it's because I'm growing up a little bit in my forties, or maybe I'm just finally settling down. Either way, this seems like a good development, and I'm feeling rather giddy about it myself.

Thursday, July 23, 2020

All the Buttons Quilt Tutorial


It's been ages, friends, I know...


Back in the middle of June I shared on Instagram that I was taking a break from social media for the summer, and it has been the BEST THING EVER. Don't get me wrong -- I love chatting with so many lovely people on Instagram and getting to see all the beautiful projects they're working on. But I've been trying to focus my attention on what's right in front of me these days, the family and friends I love who need me the most right now. After running through my days at breakneck speed for so long, becoming numb to everything except the demands of my to-do list, I almost thought it wasn't possible to live life any other way.


I'm so happy to tell you that I was wrong about that. Life has become a hundred times simpler, slower, quieter, and more peaceful than it's been for years. Suddenly I have time again to read, to talk with my husband, to sew with my girls, to play, to think, to dream. It's been a balm to my soul and a treasure that I can't imagine giving up lightly. So for now, I'm continuing my break from social media, though I did want to drop by this space to say hello, catch up with a little news, and share a quilt tutorial that I promised myself I would give you before the summer was over.


Little Joe the kitten by Heidi Staples at Fabric Mutt
Little Joe at 2 weeks

If you follow me on Instagram, you'll remember Little Joe, the tiny tabby kitten I found abandoned in the middle of the parking lot at my local Target. He was about two weeks old, lame in his back paw, and very near death when I rescued him that day and took him home.


Little Joe the kitten by Heidi Staples at Fabric Mutt
Teeny tiny Joey


At the time, I had no clue how much care and commitment is involved with raising young orphaned kittens. It's truly like taking in a newborn baby. I spent weeks bottle feeding him through the days and nights, keeping him warm, massaging his back legs, relying heavily on videos by The Kitten Lady and on help from my vet to face each new challenge.


Little Joe the kitten by Heidi Staples at Fabric Mutt
Joey at 3 months


I promised Joey's many fans that I would give an update on his progress during the summer so that you could see how much he's grown. He's now 3 months old, and not only are his legs perfectly healed, but thankfully we've also been able to set up a room for him inside our house despite my parents' and husband's cat allergies. A special air filter in the room and weekly baths have kept the dander at bay. My husband loves to have coffee with Joe every morning while he feeds him his breakfast, and Dad pops in to cuddle with Joey every afternoon. Watching my men together with this cat just melts my heart. I'll always be his mama, but I think he saves his loudest purrs for the guys.


Little Joe the kitten by Heidi Staples at Fabric Mutt

Joey is still a rambunctious little goofball who loves to climb and play with his toys and my girls every day. But my favorite moments are when he climbs up into my lap and touches his wee nose to mine just to say "I love you." We are so incredibly grateful to have him in our family, and seeing him happy and playful in his special room just brings me all kinds of joy.


Double-Zip Clutch Travel Sewing Kit from Sew Organized for the Busy Girl by Heidi Staples of Fabric Mutt

I also wanted to share with you these sewing kits I made for my girls, who all wanted to practice sewing hexagons this summer. I let them each choose their main fabric from my stash, and then I picked coordinating prints to go along with that.


Double-Zip Clutch Travel Sewing Kit from Sew Organized for the Busy Girl by Heidi Staples of Fabric Mutt

The pattern is the Double-Zip Clutch from my first book Sew Organized for the Busy Girl which I shrank down to about half size. It makes an absolutely perfect travel sewing kit. I made one for myself years ago which I've taken on plane trips for easy-to-pack sewing on the go. I love that it has a spot for all the supplies and every tool I need to bring along. Right now the girls are sewing Laundromat Coin Pouches from my book Patchwork USA, and they're having so much fun.


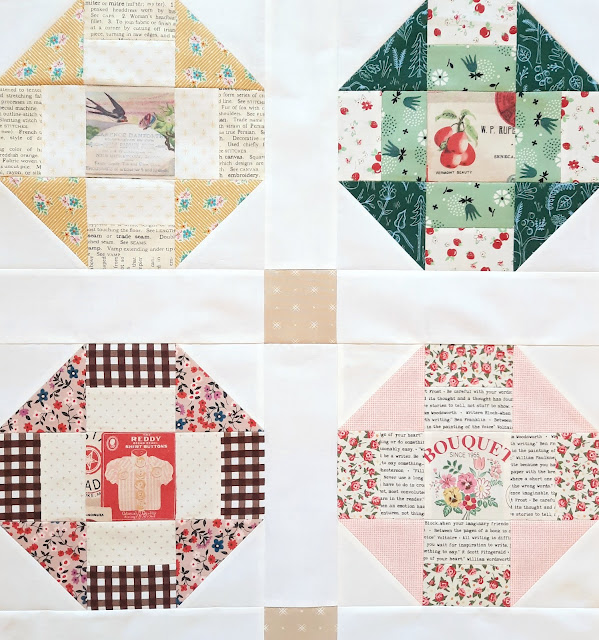
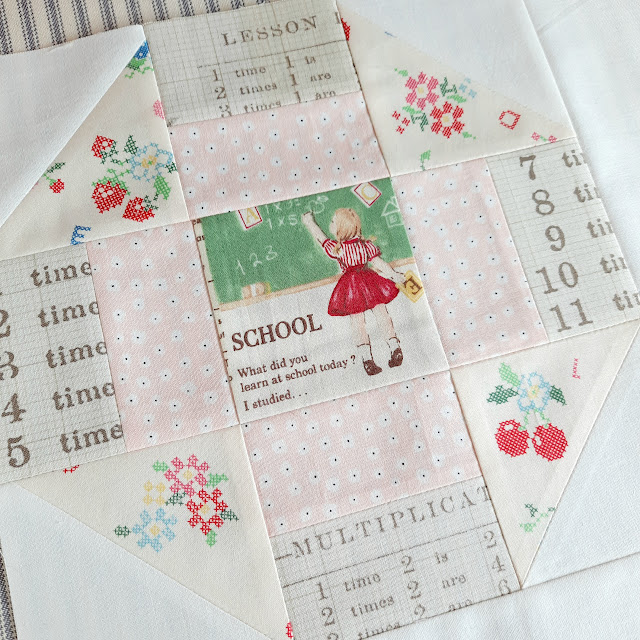
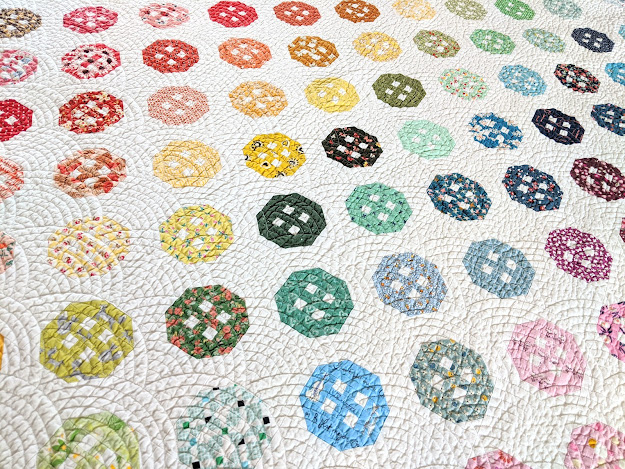
And now on to the pattern! This quilt was originally going to be published in my abandoned Carnival of Patchwork book. I had dreamed for ages of making a quilt with a ton of little button blocks on it, and it was so much fun to see that dream become reality in this project. It took me three long months to sew this one together, but I'm absolutely crazy about it. My friend Jennifer at Farm Fresh Stitches did the gorgeous quilting in a classic baptist fans motif. This block would look darling on so many other projects too: a tote bag, a zipper pouch, a pillow. Even if you don't feel like making a whole quilt, try it out on something small and have fun with it!


All the Buttons Quilt Tutorial

Finished Size: 53’’ x 60’’

Finished Block Size: 3 1/2" x 3 1/2"


Materials


From 97 5’’ squares of various colored prints, cut from each:

- (2) rectangles, 1’’ x 2’’ for button blocks (A)

- (2) rectangles, 1 1/2’’ x 2’’ for button blocks (B)

- (2) rectangles, 4’’ x 1 1/2’’ for button blocks (C)


From 2 yards of white solid, cut:

- (2) rectangles, 1’’ x 2’’ for button blocks (D)

- (4) squares, 1 1/2’’ x 1 1/2’’ for button blocks (E)

- (98) squares, 4’’ x 4’’ for alternating squares (F)

- (4) rectangles, 4’’ x 53’’ for borders (G)


From 2 yards of wide batting, cut:

- (1) square, 70’’ x 70’’ for interfacing (H)


From 2 yards of 108’’ wideback fabric, cut:

- (1) square, 70’’ x 70’’ for quilt backing (I)


From 1/2 yard of pale blue floral fabric, cut:

- (6) rectangles, WOF x 2 1/2’’ for quilt binding (J)


Make the Blocks


1. Sort the pieces for each button block into 100 stacks. Each stack should include 2 A rectangles, 2 B rectangles, and 2 C rectangles from a single Colored Print. It should also include 2 D rectangles and 4 E squares from the White Solid

All the Buttons Quilt Free Tutorial by Heidi Staples of Fabric Mutt

2. Sew a D rectangle to either long edge of an A rectangle. Cut the resulting piece in half through all 3 rectangles as shown in the illustration above.


3. Sew the pieces from step 2 to the upper and lower edges of the remaining A rectangle. Sew the B rectangles to the right and left edges of the block.


4. Sew the C rectangles to the upper and lower edges of the block. Use the E squares to snowball the 4 corners of the block, to yield a finished block as shown above.


5. Repeat steps 2-4 with the pieces for the remaining blocks, giving you a total of 97 blocks. 

All the Buttons Quilt Free Tutorial by Heidi Staples of Fabric Mutt

Make the Quilt


1. Arrange the button blocks and F squares as shown above, organizing the colors in whatever order you like best. Sew the blocks and alternating squares together in rows. Then sew the rows together.


2. Sew a G rectangle to the right and left edges of the quilt top. Then sew a G rectangle to the upper and lower edges.


3. Quilt and bind as desired.


All the Buttons Quilt Free Tutorial by Heidi Staples of Fabric Mutt
All warm and crinkly after coming out of the wash...


If you make anything with this tutorial, please share your photos! You can use the tags #fabricmutt and #allthebuttonsquilt. I'll be back on Instagram sometime in the fall to check in, so be sure to tag me @fabricmutt so I can see it then.


I hope you're all having a beautiful summer and doing the things you enjoy best. Most of all, I hope you're getting time with the people you love. Enjoy every minute of it!

Tuesday, April 9, 2019

Soda Pop Shop Quilt Finish

Soda Pop Shop Quilt by Heidi Staples of Fabric Mutt using Perfect Party by the Cottage Mama for Riley Blake Designs

I just took a walk down to the end of our driveway to see if the mail was here. Our mailbox was empty, but it was absolutely worth the trip. Texas is looking gorgeous today. After a rainy weekend, the trees and plants are looking lush and green again, and the sky is pure blue. My neighbor has hopped on her riding mower next door (my husband will probably be doing the same thing tonight after he gets home from school), and I can smell that amazing scent of cut grass in the air. There are butterflies dancing on the wildflowers, horses grazing in the pasture behind our property, and birds chirping at each other in the trees by my front door. Best of all, the temperatures are starting to warm up enough that we just might be able to try a dip in the pool this weekend. The girls can't stop talking about it and were already laying out their swimsuits last night in excitement.

Soda Pop Shop Quilt by Heidi Staples of Fabric Mutt using Perfect Party by the Cottage Mama for Riley Blake Designs

My Soda Pop Shop Quilt came home from Farm Fresh Stitches last week, and I just can't say enough about their quilting. I asked for a Baptist fans pattern, something I've always wanted on one of my quilts. Wow, was I thrilled with the results. It looks so beautiful, and the texture is amazing. I cut up the last of my green and blue plaid from the Perfect Party collection for the binding, and it stretched exactly long enough to fit. James helped me take some photos of the quilt outside after we got home from church on Sunday. By then the thunderstorms had stopped, and all the trees were dripping wet but lovely in the background.

Soda Pop Shop Quilt by Heidi Staples of Fabric Mutt using Perfect Party by the Cottage Mama for Riley Blake Designs

After long thought, I decided to give this quilt to my youngest daughter. Mouse has always been such a little thing that most of the quilts I've made for her have been on the small side -- perfect for cuddling but not quite large enough to cover her bed properly. This one is a wee bit small, but much closer to the right size. She was perfectly delighted to get it and keeps telling me how much she likes it, especially the quilting, which she says makes it so much more "comfortable." I'm just always content to see my projects in use and well loved.

Soda Pop Shop Quilt by Heidi Staples of Fabric Mutt using Perfect Party by the Cottage Mama for Riley Blake Designs

I've gotten so many requests for the pattern for this quilt, and whether it winds up in a third sewing book or gets released some other way, I promise I won't forget to share it with you at some point here in the future. I'm so happy that you guys love it too.

Friday, April 5, 2019

My Tea Party Quilt in APQ Magazine

Tea Party Quilt for American Patchwork & Quilting Magazine by Heidi Staples of Fabric Mutt
Used with permission from American Patchwork & Quilting® magazine. ©2019 Meredith Corporation. All rights reserved.

It's amazing to me how many events in my life have been marked by a tea party. My mother loved to splurge at least once a year by taking my sister and I to a tea room in our small town when we were growing up, and sometimes my grandmother would come along too. For our first official date, my husband James took me to the Rose Garden tea room at the Huntington Library in California on a rainy January day. I remember walking around the gardens with him afterward, sharing an umbrella together as we laughed and talked and took our first steps into the most important relationship of our lives. I took my extended wedding party out for tea before I got married, joined my mother and mother-in-law for tea when James' parents came to visit from Arizona, and celebrated a bittersweet tea party with the women in my family before we left California for Texas. I've hosted special holiday teas in my home for friends and family each year, and I've enjoyed making tea and cookies for my daughters on Friday afternoons to celebrate the end of a long week. Every family has little traditions that become part of the fabric of who they are, and this has definitely been one of ours.

Tea Party Quilt for American Patchwork & Quilting Magazine by Heidi Staples of Fabric Mutt

So it seemed like such a natural fit to design the Tea Party quilt featured in the June issue of American Patchwork & Quilting magazine. I wanted to make a different kind of sampler quilt, something small that would be fun for fussy cutting, and I loved the idea of using tiny traditional quilt blocks to decorate teacup blocks. The flying geese border makes me think of a string of party bunting all around the quilt. It looks so happy!

Tea Party Quilt for American Patchwork & Quilting Magazine by Heidi Staples of Fabric Mutt

There's nothing that I enjoy more than a scrappy quilt, and this project is perfect for emptying out the scrap basket, especially treasured little bits that are out of print now. Some of these fabrics were designed by wonderful friends and a few were even from my own collections, so that made this quilt extra special to me.

Tea Party Quilt for American Patchwork & Quilting Magazine by Heidi Staples of Fabric Mutt

I think this mini would be so sweet to hang on the wall in a kitchen or dining room or even a child's room. Finishing at only 38 1/2" square, it makes a nice gift for a little one. I often made quilts this size for my daughters to use as play mats for tea parties or soft spots to cuddle up with a pillow and a picture book when they were young. If you don't have time to make a whole quilt, try turning one block into a cute mug rug (see the magazine for this adorable idea from one of their project testers). And wouldn't these blocks make such a darling set of little tea time placemats?

Used with permission from American Patchwork & Quilting® magazine. ©2019 Meredith Corporation. All rights reserved.

If you make one of these, please share it! You can add the hashtag #teapartyminiquilt, and be sure to tag me @fabricmutt. The June issue of American Patchwork and Quilting is out on newstands now -- isn't that cover quilt amazing?! -- so be sure to grab a copy while you can!

Rabbit Trails

Linen and Canvas Log Cabin Quilt by Heidi Staples for Fabric Mutt

One of my favorite paintings is a piece of concept art that Mary Blair created for Disney's Alice in Wonderland. I ran across it once when I was doing research on her, and when a tiny version of the painting printed out along with the text, I framed it. At first glance, it looks like a soft wooded landscape...until you look closely near the lower right edge to see a glimpse of the white rabbit hurrying off on his way, the sight that sent Alice running off on her great adventure. I've often thought that this painting reminds me so much of the way I tackle my creative pursuits. I seem to follow all the white rabbits that come across my trail.


I've been playing along with the Sunny Day Supply Log Cabin Sew Along on Instagram (#sunnylogcabinsal) since last week, and it's been such a relaxing, enjoyable project for me. I decided to make my quilt entirely from my linen and canvas stash, prints I've been collecting for years but don't use as often as I should.

Fabric for Linen and Canvas Log Cabin Quilt by Heidi Staples for Fabric Mutt

I cut 3" squares from a darling teatime print for my centers and then cut a whole bunch of 1 1/2" wide strips for the rest. I wanted the quilt to have a light, airy look to it, so I pulled in a lot of neutrals to balance out the colors.

Linen and Canvas Log Cabin Quilt by Heidi Staples for Fabric Mutt

Every block felt like a new adventure to me as I lay out centers and strips on my cutting mat and played with placement as you can see above. I had no idea where I was going with each one until I finally settled on something that felt right. Sometimes I would have everything in place and then get another idea and pull it all to pieces to follow that white rabbit, which almost always seemed to lead me to better things.


My original plan was to make 9 blocks, but after sewing together 4, that white rabbit came running past me, and I had to follow it. I played around with different arrangements of blocks and strips and center squares, and this was the result. It's a small quilt, only 40" square, but packed full of fabrics that I love.

Linen and Canvas Log Cabin Quilt by Heidi Staples for Fabric Mutt

I haven't decided yet if I'm going to quilt this one by hand or by machine, but that's okay. There's time. That's what I love about this sort of sewing. It doesn't matter where you go with it or how you get there or what time it takes you, just so long as you're having fun.

Friday, March 1, 2019

Shortcake Picnic Medallion Quilt Tutorial

Shortcake Picnic Medallion Quilt Tutorial by Heidi Staples of Fabric Mutt for Riley Blake Designs

Last June while our family was on our amazing road trip back east, I was in touch with Riley Blake about the quilt pattern that I needed to design to go along with my Shortcake collection. There's not a doubt in my mind that I was heavily influenced by the textiles and art we saw in Williamsburg and Mt. Vernon when I finally sat down late one night with a pad of graph paper and my colored pencils in our hotel room and sketched out the diagram that would become my Picnic Medallion Quilt. It seems fitting that the quilt I designed to feature Shortcake, which as I shared in a previous post is really an ode to the joys of summer, was designed while our family was taking our first summer road trip. Just looking at this quilt brings back so many wonderful memories...

Shortcake Picnic Medallion Quilt Tutorial by Heidi Staples of Fabric Mutt for Riley Blake Designs

I sewed up a mini version of this pattern for my Quilt Market Booth last fall, which you can see in all the photos for this post, so I decided to give you the cutting directions for both a mini and a lap size quilt, since I like for you to have options. The mini makes such a cute wall hanging and is a great chance for smaller fussy cutting. As for the larger version...well, I just couldn't think of anything more perfect for a summer picnic quilt than one featuring napkins, plates, and a sweet little picnic basket in the center.

Shortcake Picnic Medallion Quilt Tutorial by Heidi Staples of Fabric Mutt for Riley Blake Designs

If you make one of these in either size, please share your pictures on social media! Use the hashtag #picnicmedallionquilt and don't forget to tag me @fabricmutt.

Here we go!

Picnic Medallion Quilt Pattern
By Heidi Staples of Fabric Mutt

Finished Quilt: 33” square (mini size) or 66” square (lap size)
Shortcake Picnic Medallion Quilt Tutorial by Heidi Staples of Fabric Mutt for Riley Blake Designs
Materials for Lap Size Quilt (less needed for mini quilt size)
1 fat quarter bundle of Shortcake
1 3/4 yd. Riley Blake Red Swiss Dot Reversed
1/2 yd. Main in Royal Blue
3/4 yd. Grove in Red
10” square Riley White Solid
1/4 yd. Riley Red Solid
1/4 yd. Rose Solid
1/4 yd. Petunia Solid
1/4 yd. Riley Royal Blue Solid
1/4 yd. Blueberry Solid
1/4 yd. Boy Blue Solid
4 yd. Berries in White (backing)
1/2 yd. Ribbons in White (binding)

Cutting Directions

Print
Part of Quilt
Mini Quilt
Lap Quilt
Main in Red
Basket cross blocks
Basket


Napkin
Plates
(12) 1” square (A)
(4) 1 1/2” square (B)
(1) 1 1/4” x 7 1/2”  (C)
(1) 1 1/2” x 7 1/2” (D)
(1) 1 1/2” x 3 1/4” (E)
(1) 1 1/2” x 5 1/2” (F)
(1) 2” square (G)
(1) 2” x 3 1/2” (H)
(2) 3” square (I)
(12) 1 1/2” square (A)
(4) 2 1/2” square (B)
(1) 2” x 14 1/2” (C)
(1) 2 1/2” x 14 1/2” (D)
(1) 2 1/2” x 6” (E)
(1) 2 1/2” x 10 1/2” (F)
(1) 3” square (G)
(1) 3 1/2” x 6 1/2” (H)
(2) 6” square (I)
Riley Royal Blue Solid
Basket lids
Plate edging
(2) 1” x 3 1/2” (J)
(20) 3/4” x 3” (K)
(20) 1 3/4” square (L)
(2) 1 1/2” x 6 1/2” (J)
(20) 1” x 6” (K)
(20) 3” square (L)
Peachy in Blue
Borders
Napkin
Plate
(4) 1 1/2” x 9 1/2” (M)
(1) 2” x 3 1/2” (H)
(1) 3” square (I)
(4) 2 1/2” x 18 1/2” (M)
(1) 3 1/2” x 6 1/2” (H)
(1) 6” square (I)
Rose Solid
Cornerstones
Plate Edging
(4) 1 1/2” square (N)
(12) 3/4” x 3” (K)
(12) 1 3/4” square (L)
(4) 3” square (N)
(12) 1” x 6” (K)
(12) 3” square (L)
Riley Red Solid
Chain blocks
Plate edging
(16) 1 1/2” square (O)
(20) 3/4” x 3” (K)
(20) 1 3/4” square (L)
(16) 3” square (O)
(20) 1” x 6” (K)
(20) 3” square (L)
Main in Royal Blue
Napkin
Borders
Plates
(1) 2” x 3 1/2” (H)
(4) 1 1/2” x 19 1/2” (P)
(2) 3” square (I)
(1) 3 1/2” x 6 1/2” (H)
(4) 2 1/2” x 38 1/2” (P)
(2) 6” square (I)
Grove in Red
Napkin
Plate
Corner cross block
Outer border
(1) 2” x 3 1/2” (H)
(1) 3” square (I)
(4) 1 1/2” square (Q)
(2) 1 1/2” x 31 1/2” (R)
(2) 1 1/2” x 33 1/2” (KK)
(1) 3 1/2” x 6 1/2” (H)
(1) 6” square (I)
(4) 2 1/2” square (Q)
(2) 2 1/2” x 62 1/2” (R)
(2) 2 1/2” x 66 1/2” (KK)
Ribbons in Pink
Napkin
Plate
(1) 2” x 3 1/2” (H)
(1) 3” square (I)
(1) 3 1/2” x 6 1/2” (H)
(1) 6” square (I)
Jam in Royal Blue
Plate
(1) 3” square (I)
(1) 6” square (I)
Grove in Royal Blue
Napkin
Plate
(1) 2” x 3 1/2” (H)
(1) 3” square (I)
(1) 3 1/2” x 6 1/2” (H)
(1) 6” square (I)
Jam in Red
Napkin
Plate
(1) 2” x 3 1/2” (H)
(1) 3” square (I)
(1) 3 1/2” x 6 1/2” (H)
(1) 6” square (I)
Ribbons in Blue
Napkin
Plate
(1) 2” x 3 1/2” (H)
(1) 3” square (I)
(1) 3 1/2” x 6 1/2” (H)
(1) 6” square (I)
Peachy in Pink
Napkin
Plate
(1) 2” x 3 1/2” (H)
(1) 3” square (I)
(1) 3 1/2” x 6 1/2” (H)
(1) 6” square (I)
Berries in Royal Blue
Napkin
Plate
(1) 2” x 3 1/2” (H)
(1) 3” square (I)
(1) 3 1/2” x 6 1/2” (H)
(1) 6” square (I)
Berries in Blue
Napkin
Plate
Corner cross block
(1) 2” x 3 1/2” (H)
(1) 3” square (I)
(16) 2 1/2” square (S)
(1) 3 1/2” x 6 1/2” (H)
(1) 6” square (I)
(16) 4 1/2” square (S)
Grove in Pink
Napkin
Plate
(1) 2” x 3 1/2” (H)
(1) 3” square (I)
(1) 3 1/2” x 6 1/2” (H)
(1) 6” square (I)
Peachy in White
Plate
(1) 3” square (I)
(1) 6” square (I)
Main in White
Plate
(1) 3” square (I)
(1) 6” square (I)
Jam in White
Plate
(1) 3” square (I)
(1) 6” square (I)
Berries in White
Plate
(1) 3” square (I)
(1) 6” square (I)
Boy Blue Solid
Plate edging
Cornerstones
(12) 3/4” x 3” (K)
(12) 3/4” square (L)
(4) 1 1/2” square (T)
(12) 1” x 6” (K)
(12) 3” square (L)
(4) 2 1/2” square (T)
Blueberry Solid
Plate edging
(8) 3/4” x 3” (K)
(8) 1 3/4” square (L)
(8) 1” x 6” (K)
(8) 3” square (L)
Petunia Solid
Corner cross blocks
Plate edging
(4) 1 1/2” x 2 1/2” (U)
(8) 3/4” x 3” (K)
(8) 1 3/4” square (L)
(4) 2 1/2” x 4 1/2” (U)
(8) 1” x 6” (K)
(8) 3” square (L)
Riley White Solid
Basket cross blocks
(3) 7/8 x 1 7/8” (V)
(6) 7/8 x 1” (W)
(3)1 1/4” x 3 1/2” (V)
(6)1 1/4” x 1 3/4” (W)
Red Swiss Dot Reversed
Center background


Chain blocks background

Napkin background
Middle background

Plate background
Outer background
(1) 2” square (X)
(2) 2 3/4” x 3 1/2” (Y)
(2) 1 1/2” x 7” (Z)
(2) 1 3/4” x 9 1/2” (AA)
(8) 1 1/2” square (BB)
(8) 1 1/2” x 2 1/2” (CC)
(8) 1 1/2” x 3 1/2” (DD)
(24) 2” square (EE)
(8) 1 1/2” x 2” (FF)
(8) 1 3/4” x 11 1/2” (GG)
(64) 1 1/2” square (HH)
(24) 1 1/2” x 3 1/2” (II)
(8) 1 1/2” x 21 1/2” (JJ)
(1) 3” square (X)
(2) 5” x 6 1/2” (Y)
(2) 2 1/2” x 13 1/2” (Z)
(2) 3” x 18 1/2” (AA)
(8) 2 1/2” square (BB)
(8) 2 1/2” x 4 1/2” (CC)
(8) 2 1/2” x 6 1/2” (DD)
(24) 4” square (EE)
(8) 2 1/2” x 3 1/2” (FF)
(8) 3” x 22 1/2” (GG)
(64) 3” square (HH)
(24) 2 1/2” x 6 1/2” (II)
(8) 2 1/2” x 42 1/2” (JJ)

Piecing Directions

Remember, all seam allowances are 1/4”, and always press seams open or toward the darker fabric!

Sew the Center Ring


1. Place 1 of the V pieces, 2 of the W pieces, and 4 of the A squares as shown in the
diagram above. Sew the smaller pieces together in rows and then sew the rows together.

2. Rotate the block so that the cross becomes an X and trim it to 1 1/2” square for the mini
version of  2 1/2” square for the lap size version, being careful to center the X as you trim it.
(You may have slightly trimmed corners but those will be hidden in the seam allowance, so
don’t worry about it!)

3. Repeat with the remaining pieces for the other 2 basket cross blocks.

4. Alternate the 3 cross blocks with the 4 B squares as shown above and sew together in a
row.

5. Sew the C strip to the lower edge of the block above and the D strip to the upper edge.

6. Sew each of the 2 J strips to the lower edges of each Y rectangle. Sew one of these units
to the left and right long edges of the E strip. Sew this unit to the upper edge of the unit from
step 5.
7. Use the G and X squares to make a pair of half square triangles following the diagram
above. Place the squares right sides together. Draw a diagonal line across the wrong side of
the X square and stitch 1/4” from each side of the line. Cut along the line, press both half
square triangles open, and trim to 1 1/2” square for the mini version or 2 1/2” square for the
lap size version.

8. Sew the half square triangle units on the short ends of the F strip as shown above and
then stitch this unit to the lower edge of the unit from step 6.

9. Sew the Z strips to the right and left edges of the center block. Sew the AA strips to the
upper and lower edges of the center block.

10. Sew an M strip to the right and left edges of the center block. Sew the N squares to the
short ends of the remaining 2 M strips and then sew those units to the upper and lower
edges of the center block to complete the center ring.

Sew the Middle Ring

1. Make the flying geese units using the H rectangles and EE squares following the diagram
above. Place an EE square on the right side of an H rectangle, right sides together. Draw a
diagonal line from the upper inside corner to the lower outside corner and stitch along that
line, trimming to a 1/4 seam allowance, and press open. Repeat with the other EE square
on the other side of the rectangle. Repeat with the remaining EE and H pieces until you
have 12 flying geese units.

2. Sew the flying geese units into rows, alternating each unit with an FF strip (pay attention
to the orientation of the flying geese units in the diagram above) and sewing a GG strip to
both long edges of each row.

3. Make the chain blocks using the O, BB, CC, and DD pieces. Arrange the pieces as
shown in the diagram above and sew together. Repeat until you have 4 blocks total.

4. Sew a flying geese row to the right and left edges of the quilt. Sew the chain blocks to the
short ends of the remaining two flying geese rows and then sew each row to the upper and
lower edges of the quilt. Pay careful attention to directionality of the blocks as you go!

5. Sew an P strip to the right and left edges of the quilt. Sew the T squares to the short ends
of the remaining 2 P strips and then sew those units to the upper and lower edges of the
center block to complete the middle ring.

Sew the Outer Ring

1. Make the plate blocks. Arrange your K, L, I, and HH pieces in groups, using the diagrams
in this pattern as a guide to which solid color borders go around which plate centers. Each
block group should have 4 K strips, 4 L squares, 1 I square and 4 HH squares.

2. Sew a K strip to the right and left edges of the I square and then to the upper and lower
edges of the square, centering them on those edges. (Note: the K strips will not go all the
way to the corners, and this is okay.) Place an L square in one corner of the block, right
sides together, sewing a diagonal line to cut across the corner. Trim the seam to 1/4” and
press open. Repeat with the other L squares. Now repeat this same process with the HH
squares in every corner to finish the block. Do the same with the remaining 19 plate blocks.

3. Sew a row of plate blocks. Alternate the blocks with II pieces, sewing them together as
shown above. Sew a JJ strip to either long side to finish.

4. Make the corner cross blocks. Arrange the U, S, and Q pieces as shown above for one
block. Sew the pieces together in 3 rows and then sew the rows together. Repeat to make 4
blocks total.


5. Sew a plate block row to the right and left sides of the quilt. Sew a corner cross block to
each of the short ends of the remaining plate block rows, and then sew them to the upper
and lower edges of the quilt. Sew an R strip to the right and left edges of the quilt, and then
sew a KK strip to the upper and lower edges of the quilt to finish the top.

6. Quilt and bind as desired.

I hope you have a wonderful time making this quilt. And don't forget to be on the lookout for
Shortcake fabric at your local quilt shop!
Related Posts Plugin for WordPress, Blogger...