Wednesday, January 16, 2013

Happening

It's been a funny sort of week. The kind where there's lots of sewing and creating going on, but nothing that you can really share about just yet for one reason or another. It leaves one in an odd place when it comes to writing blog posts, but here's a little taste of what I've been up to lately...

hand sewing my cathedral windows

newly sorted fabric drawers...I seem to be rather fond of blue...
knitting my first scarf
just add binding
Bear's new schoolbooks -- she officially starts preschool at home today

Progress. It's happening.

What's happening with you?

Linking up to WIP Wednesday.

Friday, January 11, 2013

Another Valentine (with Tutorial)


My first Valentine pillow wasn't enough - I needed another. And I decided, while I was at it, to put together a tutorial for those of you who might want to make one of your own. This pillow makes a great weekend project -- one afternoon to make the hexagons and another to put together the pillow, though those of you blessed with more free time than I have could probably finish it in one long stretch. With Valentine's Day coming up next month, I figured that I would share this with you now rather than later since there are still a good number of weekends to come before February 14th.

While I could write a tutorial on how to make hexagons, there are so many other great ones out there that I'm going to step aside and send you to the experts. My current favorite is at The Sometimes Crafter -- fantastic photographs and clear steps lead you through the entire process. For those of you who have never tried hexagons, this is your big chance...don't let them scare you! I was so intimidated by these little guys for months before I did my first hexagon project, and then I couldn't believe I had waited so long. Even if you end up deciding that hexagons aren't your thing, you can at least be proud of yourself that you tried them.


The pillow I made for my husband was slightly larger than the one I'm going to demonstrate for you here, which fits perfectly on a 12 x 12" pillow form. It's very easy to adjust the size of this pillow to make it larger or smaller by adjusting the number of hexagons as well as the size of the background fabric. You could even make it into a pincushion if your hexagons are small enough!

Materials
13 one-inch hexagons
13.5" square of fabric for the pillow front
13.5" square of batting
13.5" square of fabric for the backing on the pillow front sandwich
13.5 x 8.5" and 13.5 x 10.5" pieces of fabric for the pillow back
Fabric glue stick
Embroidery thread and needle


Lay out your hexagons in vertical rows of 2, 3, 3, 3, 2 (see photo above), balancing the colors and designs to suit your liking.


Stitch the vertical rows together first.


Then stitch the rows together to form the entire heart.


Remove the threads and papers from your hexagons and press carefully to preserve the shape of each piece. 


Place the hexagon heart on the square of fabric you're using for the pillow front. Be sure to center it horizontally. If you plan to embroider a message beneath the heart, leave enough room -- I made certain that the bottom hexagon was five inches above the bottom edge of the square. Use a fabric glue stick on the back of the outer edges of the heart to glue it in place so that it won't slip while you're attaching it to the square.


Using your sewing machine, stitch about an 1/8" inside the heart all the way around to secure it to the pillow top.


If you like, embroider a message beneath the heart, centering it as much as possible. When I embroider words, I usually write the words out on a piece of paper and copy it as closely as possible. Remember, this is a handmade project, so your letters don't need to be perfectly formed. Imperfections just add to the charm. Really.


Take your two backing fabrics for the envelope closure and fold one of the long sides in 5/8", press, fold again, and press again on both pieces. Top stitch along the folded end twice -- 1/4" and 1/2" from the edge.


Make a stack of your fabrics, carefully matching the edges and corners in the following order from bottom to top: square backing of sandwich for pillow top, batting, pillow top (right side up), larger piece of envelope closure (right side down and positioned on the top half of the pillow with folded edge toward the center), and the smaller piece of envelope closure (right side down and positioned on the bottom half of the pillow with folded edge toward the center).


Pin the corners and along the side where the envelope closure pieces overlap. Stitch 1/2" from the edge all the way around the pillow, removing the pins as you go. Trim the corners to cut down on bulk, turn the pillow inside out, and press out the corners and edges of the pillow with a chopstick. Give it a good pressing.


Top stitch 3/8" from the outer edge of the pillow, and you're done. If you make one of these, please do share a picture or two in the Inspired by Fabric Mutt flickr group. I would absolutely love to see your creations!


Is there anything better than a valentine that you can hug?

Linking up to Finish It Up Friday.

Thursday, January 10, 2013

Something New Sampler


Amy of The Cute Life has come up with a lovely idea for a new blog hop: the Something New Sampler. The bloggers participating in this event are trying a technique that is new to them and making a 7 x 14" block out of it, all of which can be pieced together to make a sampler quilt or some other project. I personally decided to attempt cathedral windows, and it's been quite the adventure so far. It kind of reminds me of that old Calvin and Hobbes cartoon where Calvin is drinking a glass of milk and says to Hobbes, "Why do we drink COW milk? Who was the guy who first looked at a cow and said, 'I think I'll drink whatever comes out of these things when I squeeze 'em?'" I spent yesterday afternoon cutting and folding and pressing and trimming and re-cutting and folding again and pressing yet again...all the while asking myself, "How on earth did someone ever come up with this idea in the first place?" Don't get me wrong -- the versions I've seen online look gorgeous, and I haven't given up hope yet. But this is definitely something you work on when you have lots of time on your hands. You can see my sneak peek above using chocolate linen and prints from Sarah Watts' gorgeous new line, Timber and Leaf. Now that I'm starting to see it come together, I'm getting a little more excited. Come back on February 4th to see who won -- me or the fabric...

Below you'll find all the details that Amy laid out about this event -- great bloggers, techniques, and prizes to be found here. Check it out!

something new sampler header

Looking for your next project?
Resolved to learn some new sewing skills this year?
Want to win some great prizes?

Then join in the blog hop for The Something New Sampler!

Each week, one or two bloggers will present a block tutorial with an uncommonly used technique. There will be a total of 9 blocks presented. And, just to mix it up, we're going with a funky modern block size - 7" x 14"! We'll have plenty of suggestions on how to use this block shape along the way. There's no need for our modern blocks to always be square :)

Here's our schedule:

Jan 14th
Amy @ thecutelifesmiles.blogspot.com | Bargello piecing

Jan 21st
Heidi @ buttonsandbutterflies.com | folding 
Chelsea @ pinsandbobbins.blogspot.co.uk | a scraptastic technique

Jan 28th
Jess @ theelvengarden.blogspot.com.au | sashiko
Lindsay @ lindsaysews.com | reverse applique

Feb 4th
M-R @ quiltmatters.blogspot.com | trapunto
Heidi @ fabricmutt.blogspot.com | cathedral windows

Feb 11th
Alyssa @ pileofabric.com | pinless curves
Becky @ myfabricobsession.blogspot.com | machine applique


And stop by the cute life on Fridays for tips and tutorials on how to set these rectangular blocks! Posts will be up on the following dates:
Jan 18, Jan 25, Feb 1, Feb 8, Feb 15

Be sure to join the flickr group to keep up with the hop, the chatter, and some inspirational photos.

Prizes!!
At the end, link up a blog post or flickr photo with anything you've done from the sampler series, even if it's just one block! There are two categories for prizes:

- finished projects, winners will be chosen by popular vote
"finished" includes an entirely completed smaller project, like a pillow, table runner, mini quilt, etc.
pieced quilt tops also count as "finished", even if not quilted

- participation prizes, winners will be chosen by a random number generator
link up any progress you've made!

Prizes for the Something New Sampler

Fort Worth Fabric Studio is an online fabric shop with yardage and some fantastic custom bundles you won't find anywhere else! One of these bundles - the Lagoon bundle - is a prize, and it is centered around Michael Miller's Lagoon line, with 18 fat quarters. You can also sign up for their newsletter to be eligible for a monthly prize. In addition to the bundle, they are also offering a $25 gift certificate.

Cotton Blossom Farm stocks great designer fabrics with plenty of modern options. One great feature of this website is the ability to search through fabrics based on categories such as color - it's just like shopping in a brick and mortar shop! You have the chance to win a set of ten 1/2 yards (of your choosing!!) of Simply Color from them.

Fat Quarter Shop is another online shop that sells yardage and precuts of some of the most popular fabrics. They offer next day shipping and have an incredibly large selection! Fat Quarter Shop also has a great selection of other items, such as books, magazines, and kits. They have generously donated a jelly roll of Paris Flea Market and an Amy Butler pattern for prizes.

Sew Me a Song is an Etsy shop that stocks Japanese and contemporary fabrics. Becca puts together some fabulous bundles of texty prints, polka dots, and - of course! - lots of Melody Miller prints. Don't miss the great collection of Type by Julia Rothman. She has created two custom bundles especially for our sampler event, one with six texty fat quarters and one with eight japanese prints. 

Monday, January 7, 2013

Lovely Year of Finishes


Just checking in quickly here to make it under the wire for the Lovely Year of Finishes link-up. I have many things on the brain this month, but the one thing I would really love to make by the end of January is a quilt and bunting for my daughters' new reading corner in our classroom here at home using the fabric in the photo above. I'll have more on this in the weeks to come -- hopefully...

Linking up to A Lovely Year of Finishes

Sweetcakes Baking Party Set Tutorial


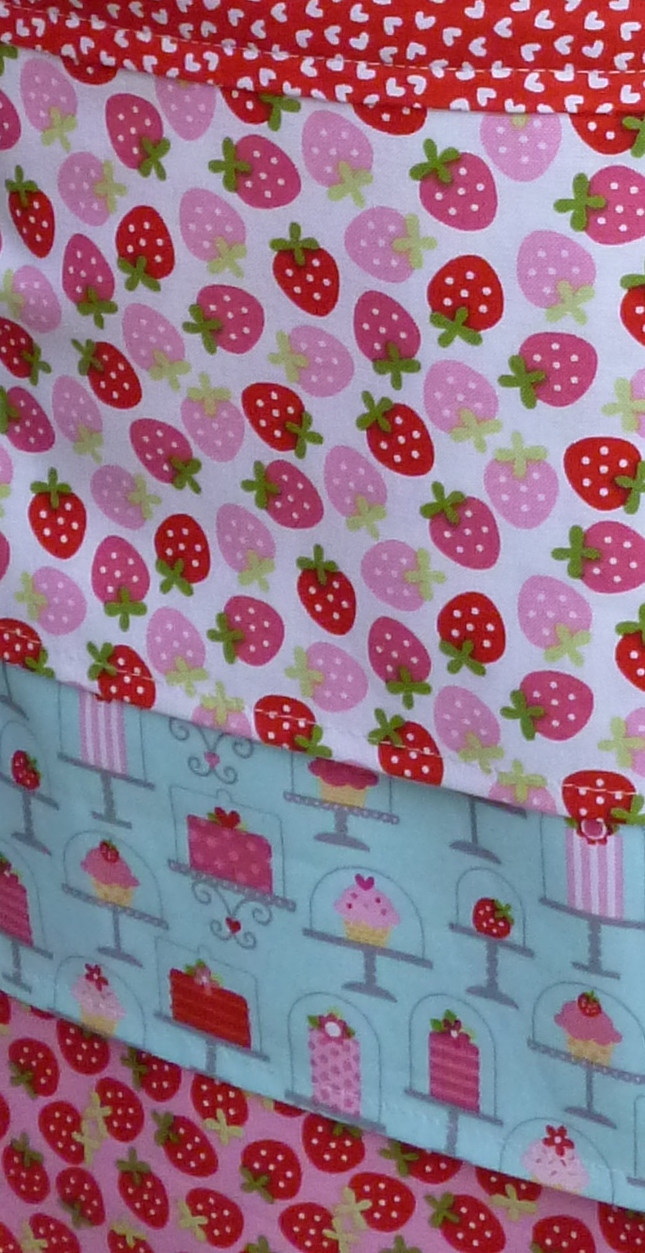
I'm so excited to be sharing a tutorial at Riley Blake Designs today! When they asked me to look at their new fabric lines for inspiration, I was immediately taken with the new Sweetcakes collection by Doodlebug Design Inc. With prints that showcase strawberries, cupcakes, hearts, and flowers, it seemed like the perfect backdrop for a little girl's baking party. And since both Valentine's Day and my oldest daughter's birthday are coming up in February, I'm definitely on the lookout for new party ideas! You get plenty of bang for your buck with this one -- it's actual four tutorials in one, including...

The Party Bag

The Cake Bunting

The Cake Rug

The Apron

Hop on over to Riley Blake Designs, and check it out!

Linking up to Plum & June.

Thursday, January 3, 2013

Valentine


It's a little early for Valentine's Day, but this pillow came together for me out of nowhere, and I just couldn't wait until February 14th to give it to my husband. Lately he's been calling me the "Queen of Hexagons" since I'm so often working on stacks of them in the evenings while we watch old episodes of Poirot mysteries.


I carefully chose a bright palette of one and a half inch hexagons for this little heart, attached it to a piece of black yarn dyed Essex linen, and embroidered our initials below in red embroidery floss. It's not fancy, but I absolutely love it and thankfully so does my husband.


The prints I highlighted for the hexagons are sprinkled with little tidbits from our life: an early picnic date, our love of cooking, the fact that we both play guitar, etc. It was fun to see how many details I could include.

A few side notes...Amy at Badskirt had a wonderfully thoughtful post on curating this week. I highly recommend that you drop by to read it. Meanwhile, my dad went outside to get his copy of the Wall Street Journal this morning and came in to announce that the paper featured an article all about Craftsy. I personally started taking three of their classes over Christmas break, and I'm completely impressed with everything about that site. I'm thrilled for them to be getting some more exposure, and even more excited that everyone in my family is acquiring my radar for all things related to sewing. :)


By the way, my something special I mentioned yesterday is coming up on Monday rather than Friday. This is why I need to start actually using my new calendar...

Linking up to Finish It Up Friday.

Wednesday, January 2, 2013

Sharing


How I wish I had a scrap pack for each one of you who left such lovely comments here over the past few days, but Mr. Random chose #9: Jane from quiltsmiles. I've sent you an email, Jane! My thanks to the rest of you for sharing sweet birthday wishes and wonderful dreams for the new year. Speaking of which...come back on Friday for something special that I can share with all of you. Above is a very tiny sneak peek. I hope you'll enjoy seeing the rest!
Related Posts Plugin for WordPress, Blogger...