Showing posts with label portfolio. Show all posts

Wednesday, January 27, 2016

The Stationery Kit Tutorial


As promised, here's the free tutorial for the Stationery Kit I shared with you on Monday for the Paperie Blog Tour.


This little kit is perfect for holding stationery (of course!), to-do lists, recipe cards, EPP projects, embroidery projects, school flashcards, craft supplies, and whatever else you brilliant people come up with to tuck inside.


I think this would make a fabulous Valentine's Day gift. Just pop in a few goodies from the dollar section at Target (notepads, short pencils, page flags, maybe even a gift card), and you've got an adorably useful gift for your kid's teacher, your best friend, or just about anyone else in your life! If you make one of these and share it on Instagram, please be sure to tag it #stationerykit and tag me too @fabricmutt.

Okay, let's sew!


Cutting Instructions

Cut 6 low volume squares 2 x 2'' for cover patchwork.
Cut 6 saturated color squares 2 x 2'' for cover patchwork.
Cut 1 rectangle 6 x 6 1/2'' for back cover.
Cut 1 batting rectangle 7 x 11'' for cover interfacing.
Cut 1 rectangle 3 1/2 x 5'' for envelope pocket.
Cut 1 muslin rectangle 2 1/2 x 3 1/2'' for envelope pocket interfacing.
Cut 1 rectangle 3 1/2 x 4 1/2'' for envelope exterior.
Cut 1 muslin rectangle 3 1/2 x 4 1/2" for envelope exterior interfacing.
Cut 1 rectangle 3 1/2 x 4 1/2'' for envelope lining.
Cut 1 rectangle 6 1/2 x 10 1/2'' for kit lining.
Cut 1 muslin rectangle 6 1/2 x 10 1/2'' for kit lining interfacing.
Cut 1 rectangle 7 x 10 1/2'' for inside pocket.
Cut 1 muslin rectangle 3 1/2 x 10 1/2'' for inside pocket interfacing.

Other Materials

2'' long piece of twill tape
2 metal snaps (You can substitute other fasteners like Velcro or a hair elastic & button if needed!)
adhesive basting spray
chopstick or turning tool
spool or other object with a round edge
pencil

*Note: all seams 1/4'' unless otherwise noted

Make the Cover


1. Arrange the 2 x 2'' squares in a 3 x 4 grid as shown above, alternating low volume and saturated prints. Sew them together to form a 5 x 6 1/2'' cover.


2. Fold a 2'' long piece of twill tape in half, wrong sides together, so that the short ends meet. Baste the short ends together 1/8'' from the short end. Center those short ends on the left side of the bottom left hand square of the cover and baste in place.


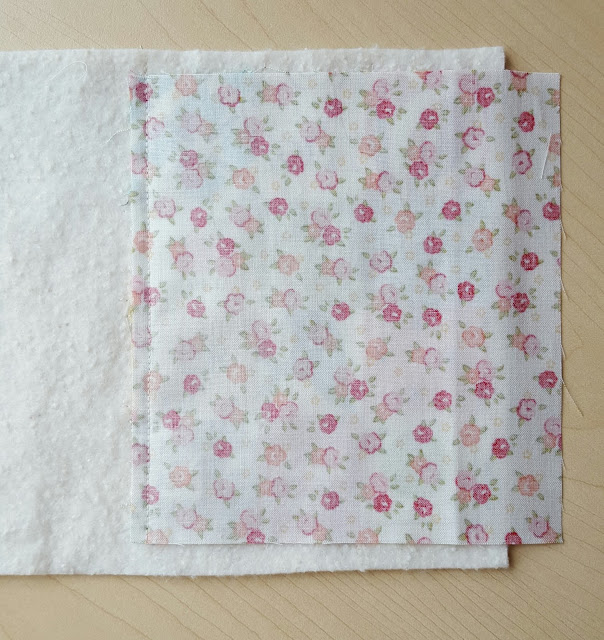
3. Use the adhesive basting spray to fuse the wrong side of the patchwork cover to the 7 x 11'' piece of batting. Keep the cover toward the right 7'' side so that there will be room for the back cover as well. Quilt as desired.


4. Sew a 6 1/2'' side of the back cover piece to the left 6 1/2'' side of the front cover patchwork piece. Use adhesive basting spray to fuse the wrong side of the back cover to the left side of 7 x 11'' piece of batting and quilt as desired.


5. Trim the excess batting off the cover. Your final rectangle should be 6 1/2 x 10 1/2''. 

Make the Envelope


1. Fold the 3 1/2 x 5'' rectangle in half, wrong sides together, so that the short ends meet and slip the matching piece of muslin between the two halves of fabric. Top stitch 1/8'' from the fold. 

2. Following the manufacturers instructions, center the stud end of the snap about 3/4'' from the pocket fold and attach securely in place.


3. Stack the pocket on top of the lower short end of the envelope lining piece so that the edges match up and baste in place. Fuse the 3 1/2 x 5 1/2'' piece of muslin to the wrong side of the envelope exterior with adhesive basting spray.

4. Place the pocket lining and envelope exterior pieces right sides together with the top of the envelope (the flap that you'll be able to see) pointed away from the pocket. Use a spool to trace and trim rounded edges on the flap corners.


5. Stitch all the way around the outside of the rectangle, leaving a 2-3'' gap on one long side. Trim the seam allowance down to 1/8'' except for where the opening is.

6. Turn the envelope right side out through the gap, carefully pushing out the corners with a chopstick. Push the raw edges inside the gap, press, and stitch 1/8'' all the way around the envelope. 

7. Attach the socket end of the snap to the flap of the envelope, carefully matching it up so that it will work correctly with the other half of the snap.

Make the Lining

1. Fold the inner pocket rectangle in half lengthwise and press. Slip the 3 1/2 x 10 1/2'' piece of muslin inside, fusing it down with adhesive basting spray if desired, and top stitch 1/8'' from the fold.


2. Place the envelope on the left side of the inner pocket, about 1 1/4'' from the left edge and 3/8'' below the inner pocket fold. Make sure that the envelope flap is open. Spray a bit of adhesive basting spray on the main back of the envelope (not the flap) to hold it in place. 

3. Stitch the envelope down by sewing over the original 1/8'' top stitching on the pocket part of the envelope and then sewing across just underneath where the flap folds down.


4. Fuse the 6 1/2 x 10 1/2'' muslin to the wrong side of the kit lining piece. Baste the inner pocket in place along the lower edge of the lining. Use a pencil or hera marker to trace a line down the center of the lining and the inner pocket, and then stitch over it to divide the pocket and lining in half.

Finish the Kit

1. Place the kit cover and lining on top of each other, right sides together. Sew all the way around the outside of the rectangle, leaving a 3-4'' gap on the top long edge, preferably over what will be the back cover. Trim the corners.

2. Turn the kit right side out through the gap, gently pushing the corners out with a chopstick. Push the raw edges back inside the gap and press. Top stitch 1/8'' from the edge all the way around the cover.


3. Center the socket half of the other snap about 1/8'' from the right side of the cover and attach (both these snaps will go through the inner pocket as well). Attach the stud half of the snap to the opposite side of the kit lining, making sure that both halves match up correctly. Fill the kit with goodies and enjoy!

Friday, May 8, 2015

Travel Portfolio Set

Biology Travel Portfolio Set by Heidi Staples for Modern Patchwork Magazine

Earlier this year I finished my Travel Portfolio Set for the Spring issue of Modern Patchwork Magazine which has just finally been published. The lovely people at Cloud 9 Fabrics were kind enough to donate some of Sarah Watson's stunning Biology collection for this magazine project. I think Biology is one of the most original collections to come on the market in the past year, and between you and me, I want to cover everything I own with that dreamy border print on the left. It's truly stunning!

These portfolios are available in two sizes, and they're perfect for work, school, or household lists. They make a wonderful last minute gift for teachers, moms, or grads too. Just add a pad of paper and something to write with -- even a gift card, if you're feeling really nice! -- and you're in business.

Biology Travel Portfolio Set by Heidi Staples for Modern Patchwork Magazine

You can pick up a copy of Modern Patchwork in your local book store or quilt shop, or you can just buy one online right here. There are some amazing projects in this issue, and I'm pretty honored to be featured alongside such talented people!

Happy weekend!

Friday, July 18, 2014

Market Set

Melody Miller Market Set by Heidi Staples of Fabric Mutt

Yesterday was my mother-in-law's birthday, and we celebrated by spending several days in San Diego with her and my father-in-law. It was a great little vacation -- lots of fun activities and family time. Before we drove down there on Monday, I sewed up a little gift for her.

Melody Miller Market Set by Heidi Staples of Fabric Mutt

I'm a huge fan of anything by Rifle Paper Co., including this adorable shopping list pad which I picked up at Anthropologie. A few prints by Melody Miller, some twill tape and batting, a rubber band, and a wooden button all came together in about an hour to make a simple little carrier that fits nicely inside a purse. I love quick projects like these which can be easily pulled out when I need a nice gift in a hurry.

Happy Birthday, Grandma Mary. We love you!

Thursday, May 30, 2013

Challenge


Back in March I answered a Creative Troupe Callout by C&T Publishing to make a project using Kraft-tex, a heavy duty art paper. It was quite the challenge deciding what to make, but I finally decided on a portfolio featuring the paper as the outside cover. I added a patchwork detail to the front and fabric binding along the outside edges. Sewing with paper is tricky and not nearly so forgiving as fabric. I had to rip the patchwork piece off my first attempt and try again because when I pulled out some accidental stitches, the holes were still there in the paper to remind me of my mistake. Being super careful with the second attempt had better results.


The inside has pockets for paper, utensils, cards, etc. I used some favorite fabrics for this piece, and I have to admit, it was hard to mail it off to the company knowing that it wouldn't be coming back to me. One of these days I'll have to make another to keep.

Today I'm putting the binding on my second Heather Ross quilt. This one has been in progress for a while, and I'm so happy to be wrapping it up at last. I'll have pictures for you tomorrow, so be sure to stop by!

Friday, February 15, 2013

EPP Case


I am so excited about the project I'm sharing with you today. This block of hexagons has stumped me for weeks, as I tried to decide what I wanted to do with it. Well, I finally figured it out. Meet my new English Paper Piecing Case.


The retro library case that I made last year never got around to carrying books -- it was too perfect for holding my EPP projects on the go. But since there's only one pocket on the inside, I usually found myself stuffing all my pieces into various Ziploc bags. Efficient, but not very pretty to look at. This little organizer has been a long time coming, but I am absolutely thrilled with it.


Take a look, folks. There's a pocket for everything...everything -- paper pieces, basted pieces, scissors, thread, seam ripper, and fabric! I even zig-zag-stitched a tiny pincushion to the center of the case; I like to have a landing spot for my needle when I'm working on a project in the evenings since needles that get set down in my room have a way of disappearing and then reappearing in someone's foot. I used black yarn dyed Essex linen for the body of the case and sewed down the hexagon block on top of the outside. The inside features my new prints from Shelburne Falls by Denyse Schmidt which I absolutely adore. I used another DS scrap for the flap and lined it with a fun Japanese print.


In the interest of full disclosure, I'm going to tell you that the slot for the seam ripper was a happy accident. When I sewed the final seam around the case, I went to try out the flap and found that it was way too long. After a moment of panic, I found that by doubling it over and stitching along the same outside seam line for the case, the extra fabric made a perfect loop that exactly fit my seam ripper. (Insert giant sigh of relief here.)

If you're interested in making one for yourself, the design for this case is very similar to the Navigator's Clutch tutorial I posted last summer which you can find here on my tutorials page. There was quite a bit of bulk on the edges with the extra pocket and the extra layer of hexagons that I added for this version, so I had to go slowly and be patient. It was so worth it, though. This little case is going to be well used and well loved.

Linking up to Finish It Up Friday.

Thursday, May 31, 2012

Two More for the Road


Thanks so much to everyone who stopped by for my Let's Get Acquainted Blog Hop post on Tuesday. It was great to be able to share a little more of myself with all of you, and I'm glad that you enjoyed the tutorial. Your kind comments were so appreciated! Be sure to stop by Jodi's post today at Tickle and Hide. She has a darling quilt to share along with dozens of other adorable projects on her blog. Jodi makes some of the sweetest clothes for kids that you'll find online! Libby from Miss Beau Jangles is also posting today. I've known Libby for a while now, and she's fantastic. Check out her great drawstring bag pattern tutorial today...I need to make one of these!


Speaking of the tutorial, I finished up the other two quiet packs for Bunny and Mouse yesterday, so we are now officially ready for take-off in a month! In the meantime, I'm working to finish quilting and binding the three Castle Peeps quilts I started for my daughters last month. Sewing the binding on the back of a quilt is a good project today since I'm busy caring for three little girls with colds. I can easily predict that we'll be watching Curious George for hours on end today...


See you tomorrow...hopefully with a finished quilt to share!

Wednesday, May 9, 2012

Folio Mania


Teacher gifts are finished and ready to go! I used the same wonderful pattern from the upcoming Pretty in Patchwork: Holidays book that I tried over the weekend, but this time I made them slightly larger. I also used strips instead of squares for the patchwork front in order to save a little time. For the fabrics, I used a mix of Reunion by Sweetwater, Hometown by Sweetwater, and Circa 1934 by Cosmo Cricket along with a natural colored linen blend.


The final product fits my store bought mini legal pads perfectly, and all I need to do is tuck a thank you card in the triangular inside pocket. My small project list now looks like this...

1. gifts for Bunny's AWANA teachers & aides DONE
2. purse for my mother
3. purse for my mother-in-law DONE
4. Zakka quilt magnets
5. Zakka mug rug
6. Zakka block quilt
7. birthday gift for my trainer
8. pencil pouch for Bear
9. finish Modern She Made Swap project
10. purse for myself
11. gifts for two friends at church
12. bind Bear's quilt
13. quilt & bind Bunny's quilt
14. quilt & bind Mouse's quilt
15. pillows for the family room


We're making progress! Linking up to Work In Progress Wednesday.

Monday, May 7, 2012

Shopping List Folio


It's a good thing that Amanda Jean of Crazy Mom Quilts is hosting a Small Projects Sew Along, because it seems like there are a million little projects that need doing this month. The idea is to make a list of things you'd like to get done in the month of May, blogging and posting pictures as you finish each one. Here's the list I made over the weekend...

1. gifts for Bunny's AWANA teachers & aides
2. purse for my mother
3. purse for my mother-in-law
4. Zakka quilt magnets
5. Zakka mug rug
6. Zakka block quilt
7. birthday gift for my trainer
8. pencil pouch for Bear
9. finish Modern She Made Swap project
10. purse for myself
11. gifts for two friends at church
12. bind Bear's quilt
13. quilt & bind Bunny's quilt
14. quilt & bind Mouse's quilt
15. pillows for the family room

That's all that I can think of at the moment. Looks like it's going to be a busy month.


Yesterday I was able to try out a pattern that I'll probably use for the first item on my to-do list: the holiday shopping list folio from the upcoming book Pretty in Patchwork: Holidays, which is coming out in August. Lark Crafts has a link to the pattern on their website here.


It's a great little project which reminds me quite a bit of the Zakka pieces I've been doing lately. The only trouble I had was that my pieces didn't quite match up at the end, and I needed to add an extra strip of linen at the bottom of the front panel, but I actually kind of like the way it turned out. For my fabric, I used Salt Air by Cosmo Cricket, a natural linen blend, and a piece grey dot print by Denyse Schmidt. I plan to make a set of these to give to Bunny's teachers and aides at her AWANA Bible club which is wrapping up classes for the year on Thursday. Guess I'd better get hopping on this one if I'm going to make it in time!


Linking up to Sew Modern Monday & Manic Monday.
Related Posts Plugin for WordPress, Blogger...