

As promised, here's the free tutorial for the Stationery Kit I shared with you on Monday for the Paperie Blog Tour.

This little kit is perfect for holding stationery (of course!), to-do lists, recipe cards, EPP projects, embroidery projects, school flashcards, craft supplies, and whatever else you brilliant people come up with to tuck inside.

I think this would make a fabulous Valentine's Day gift. Just pop in a few goodies from the dollar section at Target (notepads, short pencils, page flags, maybe even a gift card), and you've got an adorably useful gift for your kid's teacher, your best friend, or just about anyone else in your life! If you make one of these and share it on Instagram, please be sure to tag it #stationerykit and tag me too @fabricmutt.


Okay, let's sew!

Cutting Instructions
Cut 6 low volume squares 2 x 2'' for cover patchwork.
Cut 6 saturated color squares 2 x 2'' for cover patchwork.
Cut 1 rectangle 6 x 6 1/2'' for back cover.
Cut 1 batting rectangle 7 x 11'' for cover interfacing.
Cut 1 rectangle 3 1/2 x 5'' for envelope pocket.
Cut 1 muslin rectangle 2 1/2 x 3 1/2'' for envelope pocket interfacing.
Cut 1 rectangle 3 1/2 x 4 1/2'' for envelope exterior.
Cut 1 muslin rectangle 3 1/2 x 4 1/2" for envelope exterior interfacing.
Cut 1 rectangle 3 1/2 x 4 1/2'' for envelope lining.
Cut 1 rectangle 6 1/2 x 10 1/2'' for kit lining.
Cut 1 muslin rectangle 6 1/2 x 10 1/2'' for kit lining interfacing.
Cut 1 rectangle 7 x 10 1/2'' for inside pocket.
Cut 1 muslin rectangle 3 1/2 x 10 1/2'' for inside pocket interfacing.
Other Materials
2'' long piece of twill tape
2 metal snaps (You can substitute other fasteners like Velcro or a hair elastic & button if needed!)
adhesive basting spray
chopstick or turning tool
spool or other object with a round edge
pencil
pencil
*Note: all seams 1/4'' unless otherwise noted
Make the Cover

1. Arrange the 2 x 2'' squares in a 3 x 4 grid as shown above, alternating low volume and saturated prints. Sew them together to form a 5 x 6 1/2'' cover.

2. Fold a 2'' long piece of twill tape in half, wrong sides together, so that the short ends meet. Baste the short ends together 1/8'' from the short end. Center those short ends on the left side of the bottom left hand square of the cover and baste in place.

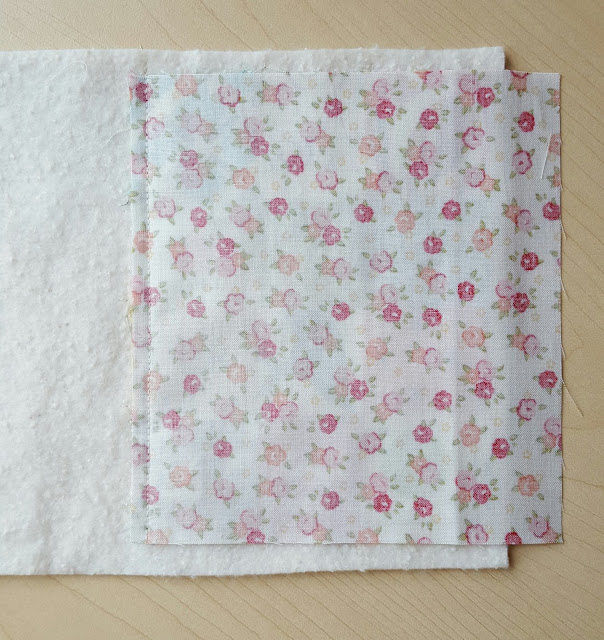
3. Use the adhesive basting spray to fuse the wrong side of the patchwork cover to the 7 x 11'' piece of batting. Keep the cover toward the right 7'' side so that there will be room for the back cover as well. Quilt as desired.

4. Sew a 6 1/2'' side of the back cover piece to the left 6 1/2'' side of the front cover patchwork piece. Use adhesive basting spray to fuse the wrong side of the back cover to the left side of 7 x 11'' piece of batting and quilt as desired.

5. Trim the excess batting off the cover. Your final rectangle should be 6 1/2 x 10 1/2''.
Make the Envelope

1. Fold the 3 1/2 x 5'' rectangle in half, wrong sides together, so that the short ends meet and slip the matching piece of muslin between the two halves of fabric. Top stitch 1/8'' from the fold.
2. Following the manufacturers instructions, center the stud end of the snap about 3/4'' from the pocket fold and attach securely in place.

3. Stack the pocket on top of the lower short end of the envelope lining piece so that the edges match up and baste in place. Fuse the 3 1/2 x 5 1/2'' piece of muslin to the wrong side of the envelope exterior with adhesive basting spray.
4. Place the pocket lining and envelope exterior pieces right sides together with the top of the envelope (the flap that you'll be able to see) pointed away from the pocket. Use a spool to trace and trim rounded edges on the flap corners.

5. Stitch all the way around the outside of the rectangle, leaving a 2-3'' gap on one long side. Trim the seam allowance down to 1/8'' except for where the opening is.
6. Turn the envelope right side out through the gap, carefully pushing out the corners with a chopstick. Push the raw edges inside the gap, press, and stitch 1/8'' all the way around the envelope.
7. Attach the socket end of the snap to the flap of the envelope, carefully matching it up so that it will work correctly with the other half of the snap.
Make the Lining
1. Fold the inner pocket rectangle in half lengthwise and press. Slip the 3 1/2 x 10 1/2'' piece of muslin inside, fusing it down with adhesive basting spray if desired, and top stitch 1/8'' from the fold.

2. Place the envelope on the left side of the inner pocket, about 1 1/4'' from the left edge and 3/8'' below the inner pocket fold. Make sure that the envelope flap is open. Spray a bit of adhesive basting spray on the main back of the envelope (not the flap) to hold it in place.
3. Stitch the envelope down by sewing over the original 1/8'' top stitching on the pocket part of the envelope and then sewing across just underneath where the flap folds down.

4. Fuse the 6 1/2 x 10 1/2'' muslin to the wrong side of the kit lining piece. Baste the inner pocket in place along the lower edge of the lining. Use a pencil or hera marker to trace a line down the center of the lining and the inner pocket, and then stitch over it to divide the pocket and lining in half.
Finish the Kit
1. Place the kit cover and lining on top of each other, right sides together. Sew all the way around the outside of the rectangle, leaving a 3-4'' gap on the top long edge, preferably over what will be the back cover. Trim the corners.
2. Turn the kit right side out through the gap, gently pushing the corners out with a chopstick. Push the raw edges back inside the gap and press. Top stitch 1/8'' from the edge all the way around the cover.

3. Center the socket half of the other snap about 1/8'' from the right side of the cover and attach (both these snaps will go through the inner pocket as well). Attach the stud half of the snap to the opposite side of the kit lining, making sure that both halves match up correctly. Fill the kit with goodies and enjoy!
Adorable and very thoughtful of you! Thank you!
ReplyDeleteAdorable and very thoughtful of you! Thank you!
ReplyDeleteThank you for this amazing tutorial!
ReplyDeleteTHIS is so cute, and your Valentine's idea will be perfect for my nieces! Thank you.
ReplyDeleteSo sweet, Heidi! It looks like the kind of project where I couldn't just make one!
ReplyDeleteThis is sweet - I think it would make a lovely little gifty to have on hand in the gift box for unexpected gifting occasions :) Thank you for the tutorial - *pinned* :D
ReplyDeleteThank you, thank you, thank you! I love this...gasp a little when I see it! You make the sweetest things! So happy I have your book!❤❤❤😍❤❤❤
ReplyDeleteThank you for your great tutorial! Where do you get your cute twill tape? You always have the best twill tape.
ReplyDeleteHow....I love this. I need to make one....thanks for sharing the tutorial! 💕
ReplyDeleteThis is so so darling and thank you so much for the tutorial! I know a few friends who would love one but first I'll be making one for me!
ReplyDeleteWhat a wonderful project. Thanks so much for posting the tutorial. I love it and can't wait to make one.
ReplyDeleteWhat a wonderful project. Thanks so much for posting the tutorial. I love it and can't wait to make one.
ReplyDeleteSo unbelievably cute! Thank you for sharing.
ReplyDeleteThank you so much for sharing this tutorial, I shall certainly have a go, they will make such lovely gifts for my crafting friends.
ReplyDeleteThis is just perfect...the right size for keeping in your purse...thank you so much for your tutorial....and I am getting fabric ready to make a few as gifts.....
ReplyDeleteThank you for sharing this sweet tutorial! I am 'pinning' it for my 'one day ' list!
ReplyDeleteThank you so much for this detailed tutorial. I'm just going to have to make some of these for my daughters...
ReplyDeleteThank you sewww much for this tutorial Heidi! I love your stationary kit and can't wait to make one using ✨Paperie✨!
ReplyDeleteYou have such a phenomenal eye for color & pattern play! Your projects are always so recognizable in their sweetness & functionality. I love it! (I also just reread Sew Organized last night... such good stuff.)
ReplyDeleteThis is really easy to follow and so cute. I can't wait to make one (or three or four) :). Thanks for sharing it.
ReplyDelete
ReplyDeleteThank you for all the stuff you do. I love all of it. Tricia
Thanks for brightening my morning with these delightful projects! Sew practical, and sew cute!
ReplyDeleteNow I know what I'm going to make my bestie for her birthday!
ReplyDeleteThis comment has been removed by a blog administrator.
ReplyDeleteThis is so darn cute! I have to make one.
ReplyDeleteI received a link to the tutorial over on SewCanShe.com. THANK GOODNESS! I've been trying to think what to make for 7 girls who are finishing a 4-year virtue development program next month. This will be PERFECT. Thank you so much. This is absolutely "adorbs" as my 12 year old says. :)
ReplyDeleteLove this! Thanks for sharing the tutorial. I am definitely going to make some of these. A great way to use up some scraps.
ReplyDeletePS: I found you via the feature on SewCanShe.com today.
Thank you so much for sharing this tutorial. I was looking for something that my sister would love for her birthday. I found it on SewCanShe.com.
ReplyDeleteWhat is the round spool used for? And where does it go in the kit?
ReplyDeleteThe round spool was just a prop for my photo shoot, actually! Usually I wind my thread on a card with this kit. It's great for embroidery projects!
DeleteHi Heidi,
DeleteThank you for the tutorials, I love them all. However, I am having real trouble with step 5 of making the envelope and cannot make head nor tail of it. I am completely stuck! I would be really grateful - if you see this comment - if you could please explain it more clearly. Thank you
When cutting the squares and rectangles should they be cut exactly as written or do we add 1/2 inch to accommodate the seam allowances?
ReplyDeleteYes, cut them exactly as written. I always figure seam allowances into my cutting instructions with all tutorials!
DeleteHello Heidi,
DeleteThank you for your tutorials, I love them all. However I am having real trouble understanding step 5 of making the envelope. I cannot make head nor tail of it and would be really grateful if you could explain more clearly.Sorry and thank you.
This place has the most perfect environment, great food, tasty wings, lots of good beer, but best of all - probably the best wait staff in all of country. Visited Chicago venues last month again, had another great time.
ReplyDeleteThanks for sharing this wonderful post with us. I like your idea of sharing this post with us. Keep sharing!
ReplyDeleteBallpoint Pen
I came across this tutorial on Pinterest. My girls are throwing a tropical girl party for about 8 young girls ... These will make such great party favors!!
ReplyDeleteThis tutorial was a lifesaver! The step-by-step guide made it so easy to follow. Thanks a ton for sharing your expertise!
ReplyDelete