Showing posts sorted by relevance for query big bear quilt. Sort by date Show all posts

Saturday, January 2, 2016

Big Bear Cabin Quilt

Big Bear Cabin Quilt using Birch Fabrics by Heidi Staples for Fabric Mutt

The design for this quilt first appeared in my sketchbook months ago. I've always been a fan of the Bear Paw quilt block, and I thought it would be fun to do a giant version of the block and turn the center of each paw into a Log Cabin block. My husband and I spent one of our early wedding anniversaries in a cabin up at Big Bear Lake in California, so there was a little nostalgia to this for me too. I've been waiting all this time for the right fabric to appear, and when I received a package of goodies from my friends at Birch Fabrics & Fabricworm, I realized that this was exactly what I'd been waiting for. I pulled together prints from their lovely new Wild Land collection by Miriam Bos (including a few extras that I went back and purchased myself because I loved them so much!), along with the new Twinkle and Firefly Mod Basics, and paired them with some Birch solids that I've been hoarding for the last year. The result is everything I dreamed it would be.

Big Bear Cabin Quilt using Birch Fabrics by Heidi Staples for Fabric Mutt

I love the mix of textures and colors in this quilt. The rustic block designs paired with flowers and stars and those darling horses. The alternating warm and cool spectrum of colors, which actually came about because I didn't have enough of the solids to make each block into an entire rainbow spectrum on its own. And the solids -- why don't I use solids more often? I love seeing them mixed in with the prints here. Yes, I know the Bear Paw isn't technically right since I have three triangles on each side of the square instead of two, but I love it this way. And that little bit of floral print mixed in with the browns makes me so happy.

Big Bear Cabin Quilt using Birch Fabrics by Heidi Staples for Fabric Mutt

The quilt sashing and binding strips are a mix of Quilter's linen and Kona solid in shades of off white -- I can't remember the exact color names. I backed the quilt in a green Twinkle print and a pale blue arrow print from Wild Land.

Big Bear Cabin Quilt using Birch Fabrics by Heidi Staples for Fabric Mutt

We've all been trying to get over a nasty cold virus at my house lately. Miss Bear was the first one to fall ill earlier this week, and to cheer her up, I let her sew a pillow cover with me using this gorgeous print from Wild Land. She is so proud of this pillow. And I think between her pillow and my quilt, we've put together a cozy spot to read by the fireplace on this rainy winter day...

Wednesday, August 16, 2017

Big Bear Cabin Pillow

Scrappy Big Bear Cabin Pillow by Heidi Staples of Fabric Mutt

My friend Susi & I have been known to swap once in a while -- fabric, little sewing projects, gummy bears...all the good stuff. This time we took requests. She made me an incredibly adorable mini featuring a felt bunny, bear & mouse (in honor of my daughters' nicknames), and I made her a scrappy pillow version of my Big Bear Cabin Quilt. I played with dimensions a bit to give this a different spin, and I really like the way it turned out. It's definitely going to be hard to let go of this one...

Scrappy Big Bear Cabin Pillow by Heidi Staples of Fabric Mutt

I always enjoy pairing random rainbow fabrics and low volume prints. It was also nice to work in a bit of brown, which can often be a neglected color in my stash. These warm brown tones for the bear paw corners feel like autumn, and I love the contrast with the other colors. 

Scrappy Big Bear Cabin Pillow by Heidi Staples of Fabric Mutt

I chose a flowered teapot for the center of the pillow. It came from a darling vintage greeting card print that I bought from Sunny Day Supply -- so much cuteness!

Scrappy Big Bear Cabin Pillow by Heidi Staples of Fabric Mutt

I quilted 1/8" from either side of the low volume strips in the blocks and in the center. The back of the pillow is a canvas print from Cotton + Steel that falls somewhere between gray and brown.

Scrappy Big Bear Cabin Pillow by Heidi Staples of Fabric Mutt

It's hard to let go of a project that you love, but it's a whole lot easier when you know it's going to live with a dear friend.

Friday, July 7, 2017

Slow Sewing: the Uppercase Quilt

Uppercase Quilt by Heidi Staples for Fabric Mutt

Back when Janine Vangool, publisher of Uppercase magazine as well as a line of superb books all written "for the creative and the curious," first introduced her second collection with Windham Fabrics, I was taken with the mix of prints. The line (officially titled Uppercase: Dots, Dashes, and Diamonds) seemed just as much at home among modern designs as they were in my collection of vintage reproductions. She was kind enough to have a bundle of fabric sent to me in order to make what I originally intended to be another version of my Big Bear Cabin Quilt. I've learned over the years, though, that plans change, and sometimes the fabric takes you in a new direction. I had no idea that this project was going to alter my entire approach to quilting.

Uppercase Quilt by Heidi Staples for Fabric Mutt

When I started this quilt, I was coming to the end of the crazy schedule that always happens before Quilt Market in the spring and fall. I had been churning out projects for different fabric companies as well as sewing up samples with my own first fabric collection, Five & Dime. It was enjoyable work but stressful, as it always is when you're trying to make a lot of different things of as high a quality as you can manage while still meeting all your deadlines. By the time I picked up the stack of Uppercase fabric, I was riding the raw edge of burnout, feeling physically drained and creatively exhausted. Suddenly I craved nothing more than simplicity, a project that would be crafted with care over time.

I scrapped the Big Bear Cabin pattern in favor of starting a log cabin block in one corner of the quilt and building it out to the opposite edge, placing the prints in color order and alternating between darker and lighter fabrics. After basting the quilt, I spent a month of evenings hand quilting along each of the rows in black thread. Once that was finished, I framed it all in binding made from a black print peppered with tiny white diamonds.

Uppercase Quilt by Heidi Staples for Fabric Mutt

This was by far the largest quilt I have ever quilted entirely by hand, and it was the first time I've hand stitched the binding on the back of a quilt in at least four years. With the simple design and hand quilting, it looks as if I could have just pulled it out of a trunk full of vintage quilts. It feels so different from any quilt I've made before, and I really believe it all lies in the fact that I made this piece slowly by hand over a long stretch of time.

There's something almost mystical that happens when you hand quilt a project for weeks on end. It becomes part of you in a way that a quick project or even a machine quilted project just can't quite equal. You enjoy the hand stitching at first and then after a while it grows a bit tedious and perhaps even challenging but you keep going. And the more you sew those even stitches along the rows over and over again, the more of your heart goes into it. The tedium remarkably transforms itself back into enjoyment, and what seemed like monotony becomes a peaceful sort of contentment. Life happens around you while you're sewing, and that becomes a part of the quilt too. You have conversations with people and you watch favorite movies and you think...you think a lot. It becomes a part of your day that you look forward to, that quiet meditation with your hands that also quiets your heart. And the day comes when you sew those last few stitches and you feel a strange mixture of joy and sadness. It's so wonderful to have it done, but you'll miss it somehow, these nights with this particular quilt in your hands.

Uppercase Quilt by Heidi Staples for Fabric Mutt

I've been a champion for small, quick sewing projects for a long time now. I love sewing little things that can be made in an afternoon or weekend. But over time, I've watched myself neglect some of the projects that I wanted to make because my schedule was too full of commitments to projects that I had to make. There is a danger sometimes, I think, for us to turn handmade pursuits into our own version of a sweatshop. We produce item after item as quickly as we can, needing fresh material for our blogs or our social media accounts. We feel compelled to accept every invitation that comes our way for fear of offending someone or missing out on an opportunity that we'll later regret passing by. Yet I'm reminded again how important it is to have priorities, to make peace with the fact that sometimes I will have to say "no," to set aside time for projects that have no other purpose than to bring me joy -- especially the slow sewing and hand quilting which I've been too busy to attempt for too long.

My Uppercase quilt will always be a reminder to me that the journey of making is just as important as the finished creation. And I'm truly eager to begin my next adventure in the days ahead.

Thursday, January 10, 2019

Meet My Next Book: Patchwork USA

Patchwork USA by Heidi Staples of Fabric Mutt (Photo by Page + Pixel for Lucky Spool Media)
All photos in this post by Page + Pixel for Lucky Spool Media

It was all the way back in 2014, before my first book Sew Organized for the Busy Girl even hit the shelves, that I started writing a second book. I had all kinds of ideas for what I wanted it to be: colorful, vintage inspired, full of approachable projects that would make thoughtful gifts and keepsakes. More than anything, though, it was going to be a love letter to my favorite kind of sewing -- simple, happy patchwork.

It's taken me a long time to bring this book into being, but I couldn't be more thrilled with the results. Patchwork USA is everything I wanted it to be and more.

Fireworks Pillow from Patchwork USA by Heidi Staples of Fabric Mutt (Photo by Page + Pixel for Lucky Spool Media)
Fireworks Pillow

When I first began working on the table of contents, I looked for a theme to pull everything together. Because I so often think of my adventures in sewing as a creative journey, I thought it would be fun to arrange my ideas around the metaphor of a road trip. Not only would this allow me to use beautiful retro photo props (Hello, vintage postcards!), but it would also give me a fun new way to frame the sewing process. So instead of talking about small, medium, and large projects, we have a chapter each on Daytrips, Weekend Getaways, and Summer Vacations. You can get a refresher on basic sewing techniques at the Visitor's Center, learn why I chose the fabrics and colors I did for every project by studying the Scenic Route, and get the story behind each pattern by reading the Historical Marker.

Tagalong Pincushion from Patchwork USA by Heidi Staples of Fabric Mutt (Photo by Page + Pixel for Lucky Spool Media)
Tagalong Pincushion

For me, this is a very personal book. So many of these projects came out of lovely memories from the past when I was a child, a single teacher, a new bride, and a young mother. It's also a book that was written very much with you, my readers, in mind. I wanted this to be a resource for each of you -- no matter what level of sewing ability you might have -- that would be useful, inspiring, and a pleasure to read. For those of you who have been so patiently requesting patterns for projects that you've seen on my blog, here you will finally find directions for the Big Bear Cabin Quilt and the Floss Mini Quilt. You'll also find the six projects which were first released as a special Fast Fabric Gifts booklet by Love Patchwork & Quilting magazine along with Issue 41, which many people have been asking me for since then. I'm so happy to have these projects together in one book as I always hoped they would be, with a grand total of twenty-four patterns in all!

Big Bear Cabin Quilt from Patchwork USA by Heidi Staples of Fabric Mutt (Photo by Page + Pixel for Lucky Spool Media)
Big Bear Cabin Quilt

So many people ask me how I put together fabric combinations in my patchwork projects, so I've included an introductory section with tips, guidelines, and checklists for choosing prints and helping them play together nicely to get the look you want, with additional advice for specific design questions. I also hope that this will become a go-to book for handmade giving, whether you're sewing by yourself or with a group of friends at a retreat or sew-in. There's a section in the book full of ideas for creative gifting, personalizing projects, and sewing activities for a crowd that will hopefully spark ideas for fun events and meaningful sharing.

You can get a sneak peek at the book on the Lucky Spool website here and preorder the book on Amazon here. The publication date is set for the end of April, and I'm counting the days until then!

Road Trip Pillow from Patchwork USA by Heidi Staples of Fabric Mutt (Photo by Page + Pixel for Lucky Spool Media)
Road Trip Pillow

I can't say enough about the guidance of my friend Susanne, head of Lucky Spool, who has believed in this project from the beginning and encouraged me every step of the way. And I'm in awe of Kristy and Nissa, the amazing women behind Page + Pixel, whose graphic design artistry and stunning photography have given Patchwork USA the vintage look of my dreams, all wrapped up inside a beautiful hard cover. When the first round of sample pages came across my computer screen last month, I was on the phone with my husband. As I started scrolling through the incredible photographs and retro design, framing the projects that have been part of my own creative journey for nearly five years, I couldn't stop the tears from coming. "This," I cried to my husband, "is the book I've always wanted to write."

Color Book from Patchwork USA by Heidi Staples of Fabric Mutt (Photo by Page + Pixel for Lucky Spool Media)
Color Book

Dear friends, it gives me so much joy to finally share Patchwork USA with you. And as it goes out into the world this spring, I hope that you'll be inspired to take a creative journey of your own and, most importantly, to share it with the people you love most. This book has been the adventure of a lifetime for me, and I'm so grateful to have friends like you along for the ride.

Sunday, June 3, 2012

Change of Plans


It's amazing how often my plans change. Take today for example. My dear husband had planned to watch the kids this afternoon so that I could spend some time sewing. On my way to the sewing machine, I went to get Mouse out of her crib from her afternoon nap, and when I opened the door, she had one leg up on the side of the crib, just seconds away from vaulting over the edge onto the floor. This was her subtle signal to let me know that she was ready for the toddler bed we've been saving for her, and it meant four hours of cleaning, reorganizing, and moving furniture so that Bunny could move into Mouse's room and Mouse could move in with Bear. Bunny's "big girl room" is above, and the "little girl room" is below. I have so many projects I'd love to work on in these rooms, including recovering the world's ugliest -- but most comfortable -- chair as you see below, but those will have to keep for another day.


At the end of a month spent working on my list for the Small Projects Sew Along with Crazy Mom Quilts, my list now looks like this:

1. gifts for Bunny's AWANA teachers & aides
2. purse for my mother
3. purse for my mother-in-law
4. Zakka quilt magnets
5. Zakka mug rug
6. Zakka block quilt
7. birthday gift for my trainer (n/a -- I'm going a different direction with this gift)
8. pencil pouch for Bear
9. finish Modern She Made Swap project
10. purse for myself (have the supplies, but haven't decided on a pattern yet)
11. gifts for two friends at church
12. bind Bear's quilt
13. quilt & bind Bunny's quilt (in progress)
14. quilt & bind Mouse's quilt (in progress)
15. pillows for the family room (have the supplies, but that's it)

So I had planned to finish everything on the list, but...life happens. What can you do? Honestly, I'm pretty happy with my progress on the list overall. Considering the fact that a few other projects sneaked into the mix this month, 11 out of 15 isn't so bad. Thanks so much to Amanda Jean for organizing this little sew along. I think it kept me more motivated than I would have been otherwise.

Hope you all had a great weekend, and that things went even better than you planned!

Linking up with Crazy Mom Quilts.

Saturday, January 4, 2020

What I Learned in 2019

Big Bear Cabin Quilt from Patchwork USA for Lucky Spool by Heidi Staples
My Big Bear Cabin Quilt from Patchwork USA

Happy New Year, friends! It's been a whirlwind of holidays and activities, family time and friendship over the past two months, and I've loved every second of it. So much has been happening in real time that it's been difficult to slip away to this space, but I'm tiptoeing back into the blog, and it feels great to be here with you again.

2019 was good to me. There were things to celebrate and not too many things to mourn. There was plenty of learning and growing which is always helpful. And there was a conscious decision to set aside time for family which was probably the best thing of all. I sat down this morning to think about what stood out to me over the past 12 months, and this is what came to mind...

1. biggest sewing accomplishment: Patchwork USA has been in the works since 2015, and I was thrilled to see it finally released into the world last July. This book is dear to my heart for many reasons, which you can read about here. Getting beautiful messages from readers who love it has brought all kinds of joy to my heart. To each one of you who bought it, thanks a million! And to those of you who haven't, you can still get a copy of your own. I hope you'll love it as much as I do.

2. biggest life change: This was the year that I felt the definite shift from being the mother of 3 little girls to the mother of 3 preteen daughters. It's been wonderful, terrifying, frustrating, exhausting, and exciting all at once, but we're finding our way one step at a time. Having my amazing husband and parents here to support me has been a lifesaver in this area more times than I can count, and together we make a great team. I'm learning the value of perspective and patience, and that sometimes it's better (but not easier) to hold my tongue and listen when the girls are having an off day. I'm pretty darn proud of these young women we're raising, who are each so smart and strong and fun. Being their mother is the hardest job in the world, but it's the best one too.

3. most surprising new habit: I've spent my whole life as a night owl, but this year I dabbled in being an early bird, and I'm still amazed at how much I like it. I don't do it every day, but getting up before dawn and sitting down with a cup of coffee (another new habit, believe it or not!) and my Bible to have a bit of quiet time before the girls are awake has been an anchor for my soul in the mornings. I'm craving more of that peace as I go into the new year.

4. most challenging new habit: I started intermittent fasting at the end of November, which basically just means that on most days, I don't eat after 2:30 in the afternoon. It's been a slow adjustment, but so far I've been pleased to see that it's really helping some of the health issues that were plaguing me last year. Like most things, it seems to get easier the longer you do it. We'll see how it goes over the next few months.

5. favorite unexpected project: I had so much fun designing some enamel pins and vinyl stickers for Maker Pin Co. last spring! They're still available here if you like that sort of thing. It was a dream assignment for me, and I love sharing them with friends when I can.

6. most influential read: The book that had the biggest impact on me this year was definitely Present Over Perfect by Shauna Niequist. I had been hurtling through life at breakneck speed for too long without realizing how much it was costing me, and this book was the wake up call I desperately needed. I'm still figuring out a lot of this stuff as I go along, but the change has been real and important in how I spend my days, and I'm so grateful.

7. favorite new accessory: My glasses are a permanent fixture now that I've crossed over into my 40's, but I like seeing a more interesting face look back at me in the mirror. Being able to read without feeling like I'm going blind is pretty nice too.

8. biggest schedule change: Now that my girls are getting older (they're currently in 4th, 5th, and 8th grade), school is taking a lot more of my time each day. We do a DVD based home school program where the girls watch their classes (taught by amazing teachers in real classrooms) at their desks, and then I make sure that they do their assignments, help them study for quizzes and tests, reteach lessons or tutor as needed, and grade all their papers. As the work is getting more challenging, the time I need to devote to teaching each day is growing. I'm perfectly happy with that since my daughters' education is the most important work I do, but it's meant that I've had to get creative sometimes when it comes to finishing the rest of my tasks each day. Exploring new ways to do this better is on my list of goals for 2020.

So those are the highlights that come to mind at the moment. I had another birthday last month, and it feels surprisingly good. The best thing about being 42 so far is realizing that I no longer need to make excuses for who I want to be. I don't need to apologize for wearing message tees, listening to Billie Holiday, reading old books about the Civil War, and staying home at night watching reruns of Psych with my husband instead of going out on the town. I don't have to feel guilty about lying down for 15 minutes with a good book in the afternoon, letting the dishes sit on the kitchen counter until later in the day, or sneaking off to get ice cream on the weekend without my daughters. The best thing I'm learning is that I don't have to be an all or nothing person in every area of my life. I can ease into new habits, tweak them a bit here and there, and take time to see what works instead of feeling like I have to start a new regime and get everything right immediately or it's no good. It takes a lot of pressure off when you stop trying to live up to the Pinterest boards and give yourself permission to be a human being.

But seriously, don't tell my daughters about the ice cream, because I still feel a little guilty about that one...

Friday, September 25, 2015

Sewing School: Tiger Lily Doll Quilts


It's been a while since I've sewed with my daughters. With the move, I just haven't had the time. But earlier this year when I first laid eyes on Heather Ross's Tiger Lily collection, I knew that this would give the girls and me something to look forward to. After weeks of hearing little voices ask, "Is it here yet, Mommy?" our package showed up earlier this month, and last Friday we finally sat down to sew.

My girls wanted to make doll quilts for their American Girl friends, so after measuring their IKEA toy beds, I decided we would make simple patchwork quilts using 16 blocks, each a finished 4" square. I cut a stack of squares for each girl which they got to arrange any way they wanted.


It was fun to observe my daughters as they walked through this creative experience, especially since they're at least a year older since the last time we sewed together. They were all big fans of the planning stage. Bunny even brought her doll in to consult on placement decisions. Bear put in a lot of time on arranging before finally coming to me with a brown square and saying, "Mommy, I don't mean to hurt your feelings, but this fabric isn't really my style." We quickly replaced it with something pink. Mouse insisted that she had a matching theme to her quilt, since she tried to make sure that similar designs in different colorways were placed right next to each other.


For the first time, I let Bunny sew by herself at the machine while I watched, and she was so proud. I got to hear all the details about a future sewing room of her own. This girl has big plans, let me tell you.


Bear and Mouse both sat on my lap during their turns, placing their hands over mine while we sewed and quilted together. I let Bear take the wheel for a few seconds here and there, but it was definitely a team effort.


We decided to do a different style of quilting for each quilt. Bunny chose wavy lines, Bear used a zig-zag stitch, and Mouse had simple diagonal lines across the squares. I've found that even though kids can tell their projects apart by the arrangement of the quilt top, it helps to use variety in the quilting designs too.


The bottom line: sewing with kids is not really something you do for relaxation, because honestly, that's not the point. It's always a challenge to keep little hands away from the hot iron, to explain what a bobbin does for the fifteenth time, to make your peace with a five-year-old's design decisions and the inevitable mismatched seams. But time spent sharing your passion with your children and seeing it become their passion as well...it's time you'll never regret.

Celebrate the end of National Sewing Month by sewing with a kid. I promise, you won't be bored.

Thursday, August 8, 2013

Bunny's First Quilt


Over the past week I've spent a lot of time thinking about what it means to be a mother. Having three little daughters is hard work -- God forgive me for all the times that I, as a single teacher, thought that stay-at-home moms had it easy. There have been moments when the responsibilities and resulting exhaustion have been almost more than I could bear. Last weekend I devoured a copy of this book which I highly recommend to all overwhelmed mothers, especially those with young children. I came away with a much needed dose of hope, a few new strategies, and a renewed commitment to spend time learning to really love and understand my children.

I'll be honest: there are times when I use my sewing as an escape from motherhood. While I don't think this is completely abnormal, I know that it's also not the best idea, especially for someone who sews as much as I do. Instead of using my sewing as a way to get away from my girls, I want to use it as a method for connecting with them more deeply. My girls have been begging me for months to teach them how to sew, so I decided that this week we were going to finally start. And today, Bunny and I finished her very first quilt.


Keep in mind, my girls are young -- ages 6, 4, and almost 3 years old -- so I'm not going to hand them a rotary cutter and my sewing machine and say, "Have fun!" Instead, I let Bunny sift through my scrap bucket, picking out any pieces she liked. We spread these out on the floor and then she would bring me a scrap or two at a time as we slowly pieced together a log cabin. I did all the cutting and pressing, and often she would sit on my lap, helping me guide the fabric through the machine with her little hand on top of mine. We didn't always agree on her choices -- there are definitely some things that I would have done differently. When I tried to give her a little gentle advice about the wisdom of including a certain scrap, she looked at me with big eyes and said, "Mommy, it's my quilt. Can't I make it the way I want it?" I knew she was right, so I backed off and let her have free reign. I also soon learned that if I in any way showed that I liked a fabric she was thinking of adding, forget it -- she didn't want it anymore. I laughed about this later when I shared it with my husband and parents, all the while tucking it away as useful knowledge for future dealings with my independent daughter.


While we sewed, we talked...a lot. I taught her new words like "seam allowance," "basting," and "binding." She chatted with me about school, her sisters, and upcoming holidays. We both shared reasons why we love sewing. When the last stitch was sewn on the binding, I was tired and my neck ached from trying to sew while looking around a six year old's head, but the satisfaction was incredible. And the look on Bunny's face...it was absolute joy.


I had waited so long to sew with my girls because I thought they were too young, but they weren't really. I just needed to adjust my ideas of what sewing with them was going to be. Bunny didn't have to sew every stitch for it to be her quilt. And I gained the pleasure of time with my daughter and some valuable insights into her life.

In the grand scheme of things, that's a pretty good deal.

Linking up to Finish It Up Friday.

Sunday, October 7, 2012

Vintage Holiday QAL Week 10: Binding


First, I want to thank you all for your sweet words about yesterday's post. You have given me so much encouragement, and I'm so grateful. Thank you, my friends.


Next I want to say -- hallelujah, it's done!! I have never taken so long to finish a quilt before, and seeing this one complete gave me such a thrill.


I bound it in a red print which adds a nice little burst of color all the way around the quilt and matches perfectly with the red flowers in the blue print I used for the border on the front.


Since my little Bear has been needing a new quilt for her larger bed, I decided to offer this one to her if she was interested. She was absolutely overjoyed. In fact, I could hardly carry the quilt to her bed this evening because she was walking along next to me trying to gather it in her arms and give it kisses. I honestly don't know if anyone loves my quilts more than my daughters do.

So here we are at the final week! Wrap up those quilts and get ready to link up your big finish some time between next Monday and Friday. The wonderful people at Fat Quarter Shop have given me two beautiful fat quarter bundles of Vintage Modern to give away to two of you who link up. You won't want to miss out!

Linking up to Sew Modern Monday and the Let's Get Acquainted Monday Link-up.

Tuesday, May 29, 2012

My Stop on the Hop

I’m so thrilled to be a stop on the Let’s Get Acquainted Blog Hop today! Beth of Plum and June has been amazing about putting this whole thing together, and I’m excited to get to know more about some of my favorite bloggers this summer. Be sure to stop by to see Amy of Amy's Crafty Shenanigans today too. She's got some great projects on her blog -- I love the Savana Bop quilt she just made for the Siblings Together charity! And also don't forget to check out Beth's blog entry from yesterday for a great interview with Deborah of Whipstitch along with a pretty fabulous giveaway...

A few of my favorite projects from 2012
For those of you who are visiting for the first time, welcome to Fabric Mutt! Sewing has been a new adventure for me this past year. After being a teacher for nine years and an assistant principal for one, I decided to become a stay-at-home mom in 2009. It was a big change for me after working since I was a teenager, and it took a while for me to find my balance. When my mom brought a new sewing machine into our home last fall, she opened up a whole new world to me. I immediately began looking for inspiration on the web, and I was amazed at the treasure trove that I found in the online quilting community. By the end of December 2011, I decided to start Fabric Mutt as a way to share my projects with my out-of-state family as well as track my own progress. It’s been incredible to connect with so many other bloggers who share my love of sewing!

I live in a busy Southern California household. My husband and I bought a home with my parents four years ago, and we also share the space with our three little girls, affectionately known as Bunny (5), Bear (3), and Mouse (1½). It’s a fantastic situation for us, and we enjoy lots of family time together. With all of the chores and child care involved in daily life, sewing doesn’t always happen as easily as I’d like it to, but I manage to fit it in as I go along.

Beth gave us a great list of questions to answer, so here we go…

How long have you been quilting? About 7 months. It feels like it’s been a lot longer than that to me!
Favorite quilting tips? Don’t be afraid to try anything. I feel like I’ve gone through a series of terrors in my sewing – afraid to try making my own binding, to put in a zipper, to try paper piecing, etc. If you’re afraid of it, then make yourself do it. I usually find that it’s not nearly so awful as I thought it was, and each accomplishment opens up a new world of projects that you can do.
Favorite blogging tips? 1) Be yourself – it’s your blog, after all, and no one else’s. 2) Get involved with the online quilting world – linky parties, swaps, sew alongs, etc. This is how you meet people and how they meet you -- however… 3) Don’t overbook yourself. If you try to join every single event happening in blogland, you will eventually burn out…trust me on this one.
Favorite fabric? I love anything by Kate Spain, Melody Miller, Heather Ross, Denyse Schmidt…how many favorites am I allowed to have?
Favorite craft book? Zakka Style by Rashida Coleman-Hale. It’s changed my sewing forever.
Favorite book? A Voice in the Wind by Francine Rivers
Favorite children’s book? The Chronicles of Narnia by C.S. Lewis or The Little House books by Laura Ingalls Wilder
Favorite quilting tool? My rotary cutter
Favorite music to listen to while quilting? Usually jazz, swing, or the local Christian radio station
Favorite TV show while hand stitching: Psych
Binding - by hand or by machine? By hand…it’s a ton of work, but it looks so beautiful when you’re done!
If I'd only known - what you wish you knew about blogging before you started your blog: Don’t lose your joy in pursuit of perfection. It’s easy to feel discouraged because your numbers aren’t as big as someone else’s, because you’re not getting packages of free fabric from designers, or because your quilts don’t look as perfect as the other ones in the linky party. You have to start somewhere, just like everybody else did. And hey, this is supposed to be fun!

So . . . on to the tutorial portion of the post! I've been experimenting a lot lately with different types of bags, pouches, and portfolios after doing the projects in Zakka Style as well as a portfolio pattern from the upcoming Pretty in Patchwork: Holidays. That experimentation led me to today's project: the Quiet Pack.


Every summer we take a road trip to visit my parents-in-law in Arizona. The visit itself is always fantastic, but eight hours in the car with three little girls? Not so much. This year I intend to be well armed with entertainment for the kids, and I thought a helpful tool might be some Quiet Packs. These are really just simple portfolios equipped with some cloth "toys" and space for picture books. Some people like to add room for a pad of paper and crayons, but I don't let my girls have crayons in the car anymore ever since the time Bunny drew all over the inside of our old Corolla with a green crayon . . . not a day to remember fondly, believe me. The great thing about this project, though, is that you can customize it in so many ways. Sew a few extra seams down the pockets, and you've got slots for crayons (if your kids are more trustworthy than mine). Add some velcro pieces to the inside, and you have a portable tic-tac-toe game. Hey, use a grown up fabric and make a pack for yourself! The tutorial is just a jumping off point...make this project whatever you want it to be.

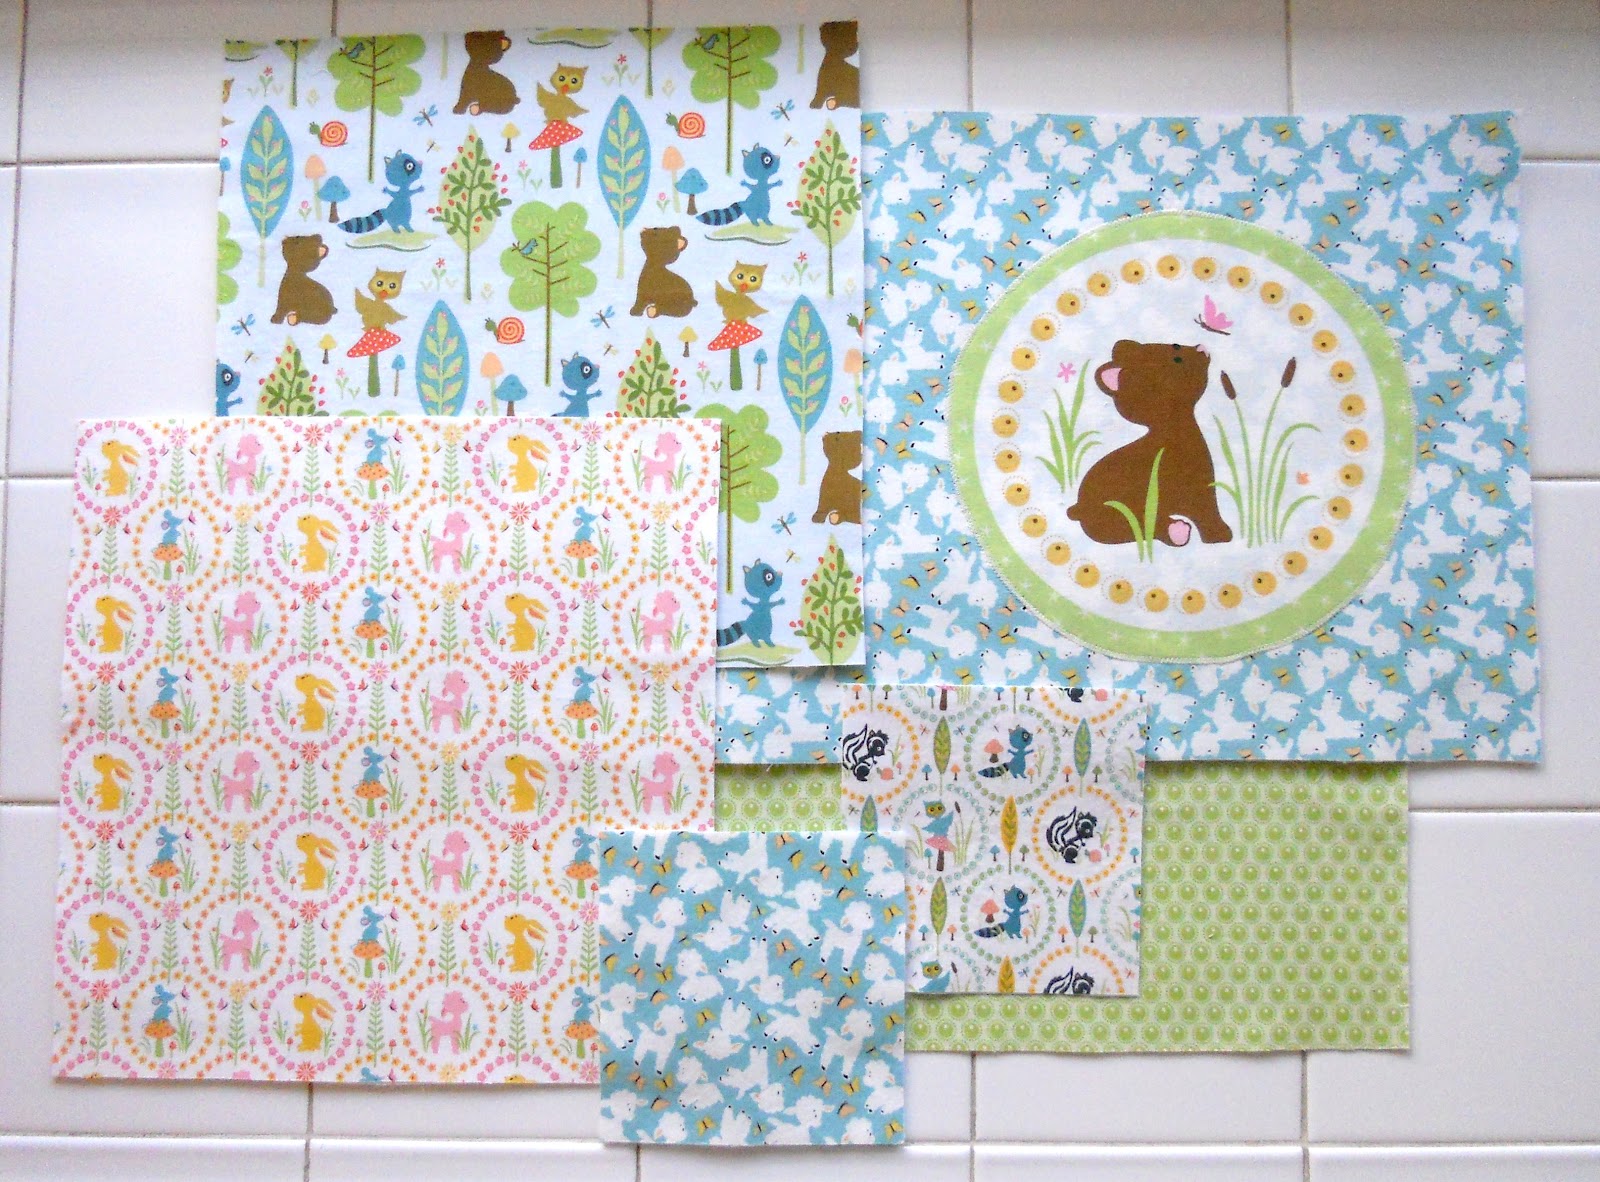
For my fabric, I used the Woodland Tails collection by Sheri Berry Designs for Riley Blake. It's not only adorable, but it features the three animals that represent my daughters' nicknames: Bunny, Bear & Mouse. I'm using the large round pictures from the cheater quilt print as decorations for the outside of each pack so that my girls can quickly see which pack belongs to them. Use a quarter inch seam allowance for all sewing unless I mention otherwise. Okay, let's get this party started!

Gather your materials:
  • About 1 yard of material (make it 1.25 if you want to be safe -- I always like to have a little extra on hand in case of mistakes) in a variety of different prints -- your design, so you get to choose!
  • fusible batting (I used Fusible Thermolam Plus)
  • fusible interfacing (I used Pellon 809 Decor Bond)
  • 4.5" strip of sew-in velcro
  • fabric glue stick (not required, but definitely helpful) 
  • coordinating thread
 
1. Cut out your pieces:
  • exterior: 23.5 x 12" print and 23.5 x 12" fusible batting
  • interior: two pieces of 12 x 12" print and two pieces of 12 x 12" fusible interfacing
  • inside pocket: 23.5 x 9" print and 23.5 x 9" fusible interfacing
  • flap: two pieces of 5.5 x 5.5" print (these can be the same fabric or two different prints -- your choice), one piece of 5.5 x 5.5" fusible batting for the exterior flap, and one piece of 5.5 x 5.5" interfacing for the interior flap
  • fabric for exterior decorative applique (optional) 

2. Use a zig zag stitch to applique the decoration to the exterior of your pack (I often use fabric glue to hold it in place before I start sewing). I just folded the exterior fabric in half, centered the circle on the front, and then moved it slightly to the left to account for the seam allowance around the outside. I also went around the circle twice to be sure that it was firmly attached since this is such a large piece of fabric, and I know it's going to get a lot of use.


3. Fuse all pieces of fabric to their appropriate backings (see the information under step one).


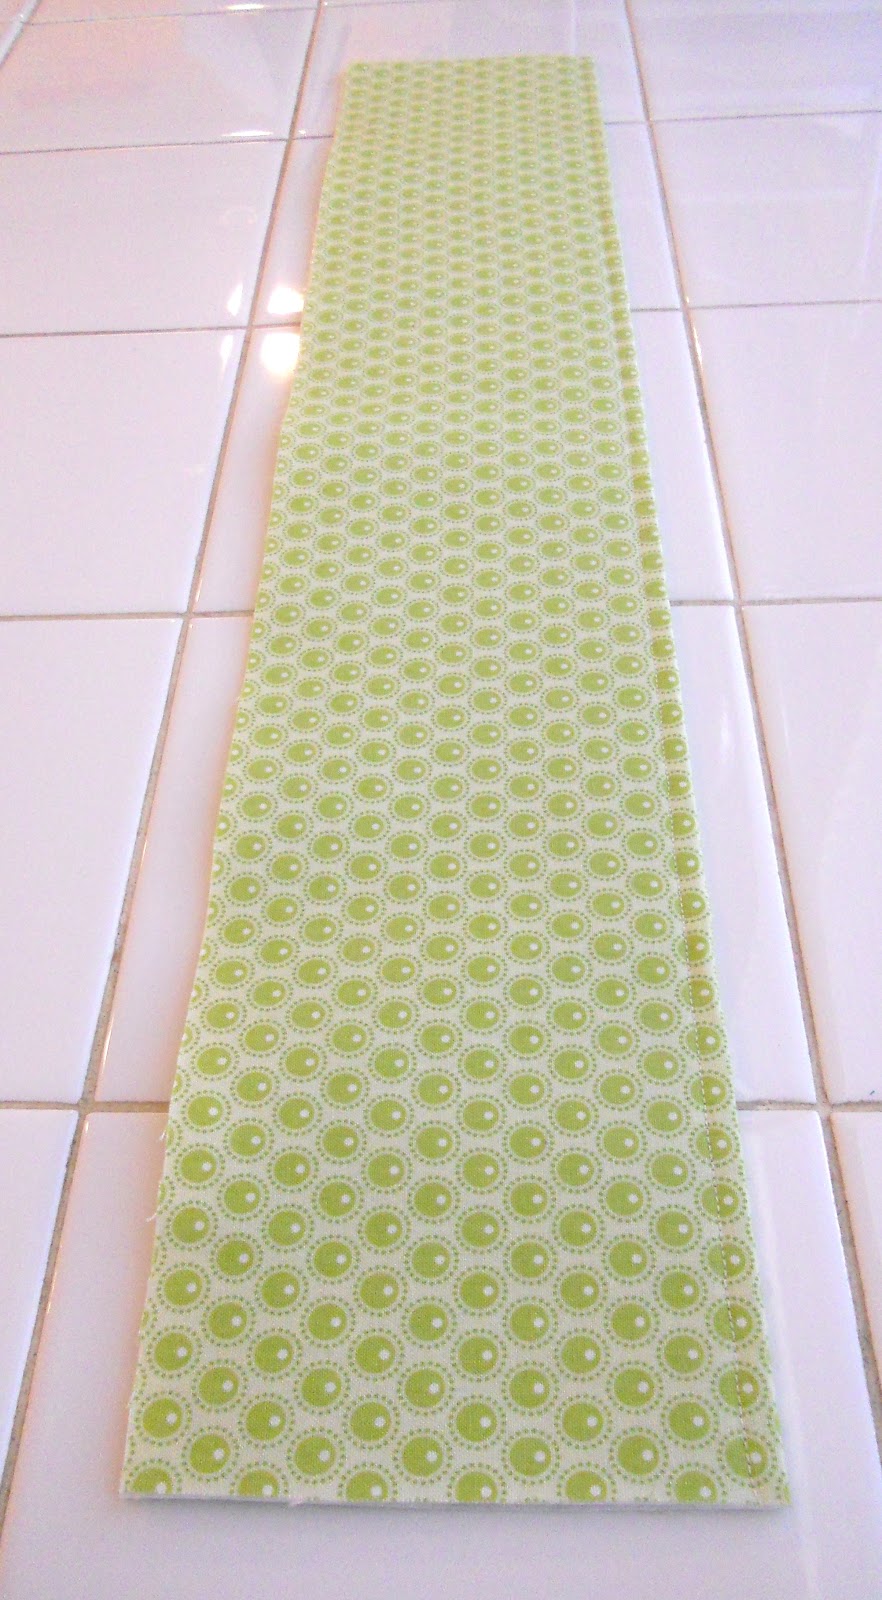
4. Place the interior pieces with their right sides together and stitch along the center line. Unfold them and press the seam allowance open.


5. Fold the fabric for the inside pocket in half length wise, press, and top stitch about a quarter inch away from the fold.


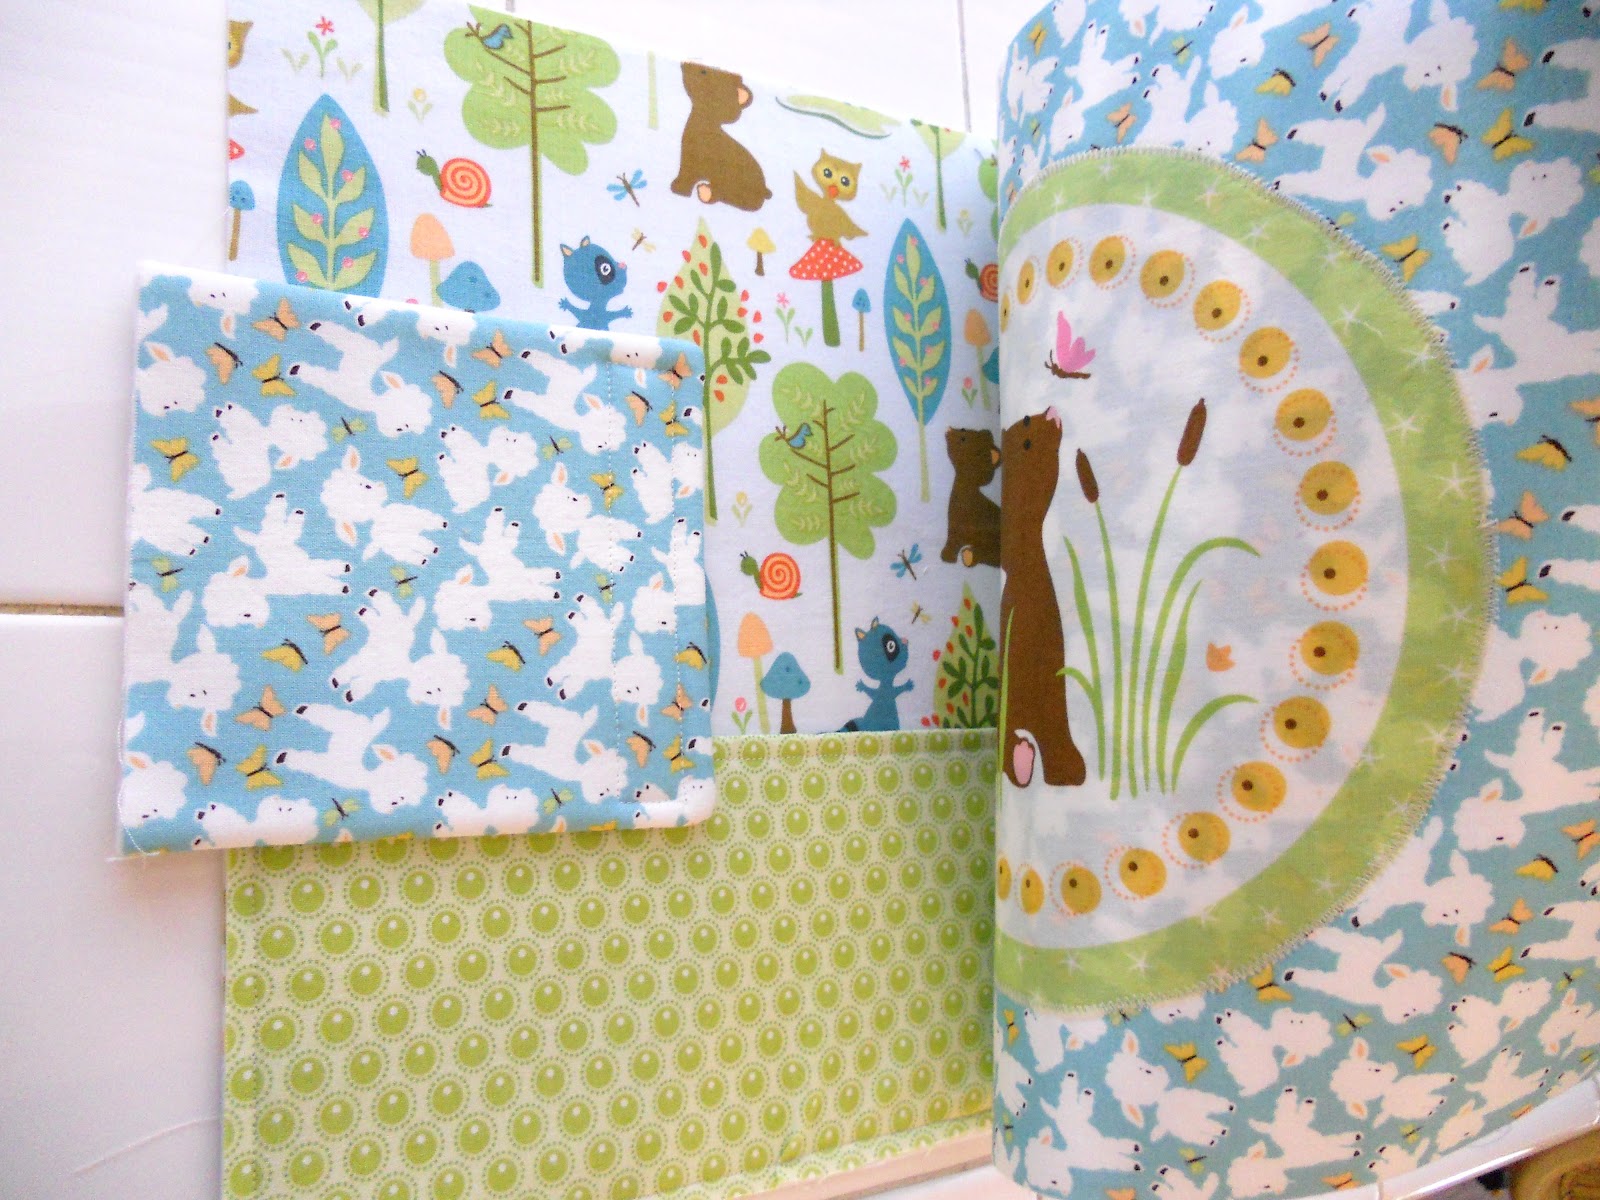
6. Pin the pocket in place along the bottom and sides of the interior and stitch all along the matching raw edges of the pocket to secure it in place. Then sew straight down the middle of the pocket to create two pockets.

7. Sew the two flap pieces together, right sides facing, along three sides -- being sure to leave the fourth side open.

8. Clip the corners, turn the piece inside out, push out the corners with a chopstick, and press.

Center half of your 4.5" velcro strip (I put the scratchier side on the flap, myself) on the end opposite the opening, leaving about a quarter inch around it on three sides. Secure it with fabric glue, then stitch all the way around the sides of the velcro once or twice.


9. Sew the other piece of velcro on the right side of the exterior piece, about an inch and a half from the short end opposite the decorative applique, stitching all around the velcro once or twice. I like to sandwich all the pieces together with the flap in place just to test out if everything is where it should be and make sure that the flap will actually reach the exterior velcro before I sew it down. (Just a note: I put my flap on this side so that it won't interfere with the design on the front. Feel free to put your flap on the other side if you prefer. In that case, just reverse the placement of the flap and exterior velcro.)


10. Sandwich the flap between the exterior and interior (right sides together), centering it on the short side with the applique. Be sure that the exterior side of the flap is facing the exterior's right side.

Let about an inch of the flap (the end with the opening), hang outside. Pin along all the raw edges.


11. Stitch a quarter to a half inch along all the raw edges of the pack, leaving an approximately five to six inch opening on the long side opposite the pocket for turning. Clip the corners and turn inside out, pushing out the corners with a chopstick.

Give the pack a nice pressing all over, turn the remaining open raw edges inside to match the sewn edges, and stitch an eighth to a quarter inch from the edge around the entire exterior of the pack. Turn the pack over and sew one final seam down the center fold of the interior, all the way down through the pocket. 


12. If you like, you can make some little characters to go with your pack. I fussy cut 2.5" squares with an animal in the center of each one, fused them to interfacing, and then sewed them (right sides together) with a backing print along three sides. I turned them inside out, turned in the edges of the open side, and stitched all along the edge of each square.

My girls will play with these guys against the forest backdrop on the left interior of the pack, but you could easily use these pieces for a matching game, tic-tac-toe, etc. 


You're done! Fill up your pack with goodies, and enjoy!


If you make a Quiet Pack of your own, be sure to link up with Monday's Let's Get Acquainted Linky Party at Plum and June so that we can all admire your beautiful work! Please be sure to leave me a comment letting me know if this is a helpful tutorial for you. I'd also love to hear what you think of Fabric Mutt -- the design, the photos, the content . . . comments and suggestions are always welcome here!


Thanks so much for stopping by today, and come back to visit again. I'd love to see you here!

Linking up to Fabric Tuesday.


Related Posts Plugin for WordPress, Blogger...