Showing posts with label table mat. Show all posts

Friday, August 11, 2017

Fussy Cut Sampler Block


I was so excited when I saw that Nichole Ramirez and Elisabeth Woo had written a book called The Fussy Cut Sampler for Lucky Spool Media. Fussy cutting is something near and dear to my heart, and I've long hoped that someone would write a book about it. Nichole and Elisabeth have done a phenomenal job putting together a collection of unique blocks with detailed tips for cutting and placing fabric within each design. So much thought and care went into every page of this book, and I can't recommend it highly enough!


For today's tour post, I was assigned a block from chapter 11, which is all about creating a narrative in your blocks. Block 44 is called "you in a block," encouraging the maker to pull together prints that show different facets of her personality and life that reflect who she is.


For my feature print in the center, I used some of the last scraps of a Japanese fabric that I've been saving for over five years. So much of my time seems to be spent shopping or cooking, so it was fun to pair these two pieces together. I especially liked the balance of the two girls facing each other. I sprinkled both a large and small floral in the block since I love flowers in any form. Blue and green are two of my favorite colors, so I needed to include them. I also added in two prints from my new Five & Dime collection. My favorite pink price tag fabric shares some of the optimism I try to bring to my dealings with the people in my life every day, and the green checklist print reminds me of the many lists I use to keep myself organized. The vintage newspaper print at the corners is a nod to my love of retro style.


Rather than keep this as an orphan block, I decided to turn it into a table mat for my nightstand. I backed it in more of the blue Denyse Schmidt floral (one of my all time favorite prints) and quilted 1/8" from either side of every seam in the block. The binding is a black and white diamond print from Uppercase 2.

I love this mat. It feels simple and sweet and almost like a more grown-up version of myself. It also goes beautifully with the blue and white toile duvet cover on our bed. I couldn't be happier with it.

If you get the chance, check out the #fussycutsampler hashtag on Instagram. There are beautiful things happening there, I promise you...

Tuesday, February 21, 2017

Goldilocks Table Set

Goldilocks Table Set by Heidi Staples of Fabric Mutt

The Goldilocks collection seems as if it belongs with my family's treasury of vintage children's picture books. I am such a fan of Jill Howarth's midcentury style of illustration, and she's created an adorable cast of characters for her designs. My daughters actually squealed when I showed them the prints.

Goldilocks Table Set by Heidi Staples of Fabric Mutt

I was sorting through all the possibilities of what to make with this fabric when my sister suggested the perfect idea while we were chatting by phone between Texas and California: a table set. "It's fitting, right?" she added, referring to the porridge incident in the Goldilocks storyline. I couldn't have agreed more.

Goldilocks Table Set by Heidi Staples of Fabric Mutt

I've been trying to add to our collection of place mats and table runners for the breakfast nook this year. It's fun to change things up with the seasons, and it's a sewing project that takes far less time than a quilt. I used simple rectangles for my daughters' place mats, and the small runner is a quilt-as-you-go herringbone pattern inspired by my friend Maureen's tutorial, which I've used before to make some of my favorite pillow covers

Goldilocks Table Set by Heidi Staples of Fabric Mutt

I tried to add some fun details like twill tape labels and crocheted lace to the set. There's also a "story" on each place mat for the girls to look at while eating their cereal in the morning. It's all very sweet and simple, but full of personality. I love having handmade items like this in our home, welcoming us as we come down to breakfast. It just seems like such a great way to start the day.

And everyone lived happily ever after.

Saturday, September 12, 2015

Fall Mug Rug

Fall Mug Rug by Heidi Staples of Fabric Mutt

From the moment my calendar turns to September, I'm ready to welcome fall back with open arms. That means pumpkins on my dining room table, molasses cookies in the oven, and sweaters in my closet -- even if it's still too warm to actually wear them. I also had fall on the brain when I was doing this week's fabric audition, a stack called Autumn Bonfire, which I put together to make a mug rug for my dad's new desk. 

Autumn Bonfire Fabric Audition by Heidi Staples of Fabric Mutt

This was the original bundle that I pulled for the project. I ended up changing a few prints slightly, but I basically stayed with this mix of gold, tangerine, and navy blue. 

Fall Mug Rug by Heidi Staples of Fabric Mutt

A Charley Harper print took center stage, surrounded by the other rectangles, giving me a mat that measures approximately 9 x 12". I backed the piece in a wonderful map design by Tim Holtz and used a brown wicker print by Juliana Horner for the binding. 

Fall Mug Rug by Heidi Staples of Fabric Mutt

And there it is...another little glimpse of fall in my house. How I love it!

Wednesday, May 21, 2014

Recipe for a Table Runner

Anna Maria Horner Quilted Table Runner by Fabric Mutt

Sew together a stack of prints by Anna Maria Horner.

Anna Maria Horner Quilted Table Runner by Fabric Mutt

Add some dense quilting courtesy of Aurifil thread in a lovely shade of gold. Be sure to sew back and forth in different directions to tug at the center seam so that it waves gently down the runner.

Anna Maria Horner Quilted Table Runner by Fabric Mutt

Include a Juliana Horner print on the back and some Kona Ivory for the binding.

Anna Maria Horner Quilted Table Runner by Fabric Mutt

Sit, stare, and be happy.

Saturday, November 23, 2013

Botanics Desk Mat


There are some fabric lines that have your heart from the moment you meet. Both of Carolyn Friedlander's collections -- Architextures and now Botanics -- have affected me that way.


These prints are so incredibly elegant in their simplicity. The sketched illustrations, the uniquely modern designs, the carefully curated colors all grab my attention and simply will not let go. A charm pack of Botanics arrived in the mail yesterday afternoon, and I couldn't wait. As soon as I finished dinner, I pulled out my Architexture scraps and some Kona solids, opened up the Botanics stack, and made myself a new desk mat using the simplest of patchwork layouts. The mat is backed in a Lily Belle print by Bari J, and I quilted it in a dark gold Aurifil thread which I absolutely love. It's a nice compliment to the little touches of gold that show up in a few of the prints.


There's nothing fancy about this little mat, but I just can't stop looking at it. These fabrics mesmerize me, and I'm so looking forward to sewing with them again. Did I mention that I have another bundle of Botanics arriving in the mail on Monday? I can hardly wait...

Monday, April 15, 2013

Playing with Fabric

Spring Patchwork Table Runner

One of my fabric auditions finally got the part: Breakfast in Bed is now a happy little runner for our dining room table. I played with the bundle a bit more before I finally settled on the right mix of three inch squares.


I used black yarn dyed Essex linen on the sides, two strips of Chicopee that I pulled from a jelly roll for the binding, and some Happy Dishes by Melody Miller for the back. It's a rather quirky side of spring, but I like it just fine.


I love these little ducklings by Heather Ross. Somehow they didn't make the cut for Nursery Versery, but I've been wanting them ever since I first saw them on Spoonflower.


Speaking of Heather Ross, have you seen the news about the Briar Rose contest that's being sponsored by Pink Castle Fabrics, Threadbias, and Windham Fabrics? Create a lap quilt using the new quilt design tool at Threadbias for a shot at enough Briar Rose fabric to actually make the quilt. I'm absolutely loving her latest fabric collection, so of course I jumped right in this afternoon and put together the design you see above. This was my first chance to play with the quilt design tool, though I've heard plenty about it in the past few months. It only took me a few minutes to get the hang of it, and I can absolutely see why people are excited about this little gadget. Just pop over to the Pink Castle Fabrics blog here to get all the details about the contest. It's free, it's fun, and you get to play with virtual Heather Ross fabric. What could be better than that?

Linking up to Fabric Tuesday.

Sunday, March 31, 2013

Girl Friday Sews: Photo Desk Blotter Tutorial


I'm so thrilled to welcome you to the first day of the Girl Friday Sews Blog Hop! Over the next two weeks, we'll be sharing tips and projects to use in all sorts of different work situations. I've gotten a few peeks at what the other bloggers are doing, and there's some great stuff coming up for you to see. Today is my day, so let's start by taking a look at where I work.


This is my desk: a five foot square corner of the family room featuring an old round work table that I cover with a table cloth. My paper clips, rubber bands, and other office notions live in spice jars and a wooden rack from Ikea -- I love using unconventional objects for storage and display when I can. Most of my papers stay in wire mesh files from Target, and the colorful fabric bin on the left is from there as well. There are two calendars on the wall...yes, two. The one on the right gives me space to write the month's events, and the one on the left is just there because it's beautiful -- I couldn't resist Rifle Paper Co.'s "Cities" calendar this year (and if you can't resist it either, you can find it on sale for 50% off here). My inspiration file hangs on the wall along with my Focus mini quilt and Zakka Style message board. It all makes for a cozy, happy space where I can sit in the morning and read through at least a few of my blogs before the girls start school.


Before I share my tutorial (sneak peek above), I promised you some tips for brightening up a workspace, classroom, or study area. Here are a few things I've picked up over the years...

1. Use fabric instead of paper on any bulletin boards. The fabric lasts much longer without fading, and it looks so much warmer at the same time. Your choice of print will depend on your own style and what you'll be putting on the board, but I usually find that a small scale print works best. Also keep in mind the effects of color on your audience. My classroom was always more peaceful when all my boards were in different shades of blue and green.

Scrappy Pillows

2. Nothing warms up a room like pillows. Stack them in a reading corner -- kids love to snuggle up in a pile of pillows while they read -- or make a small decorative pillow to hang on a wall or door. They add a welcoming touch to an office chair as well.

3. Small touches can make an office seem so much more approachable. I brought my love of retro decor into my office when I was an assistant principal, including framed WWII era posters, an old fashioned coat stand, and a CD player built like a vintage radio. Add plants -- real or fake -- to your shelves, a table cloth to your conference table, and pictures or mini quilts to your walls. You'll be surprised by the difference it makes. I keep a Pinterest board full of ideas for this sort of thing which you can see here.

Image courtesy of decor8

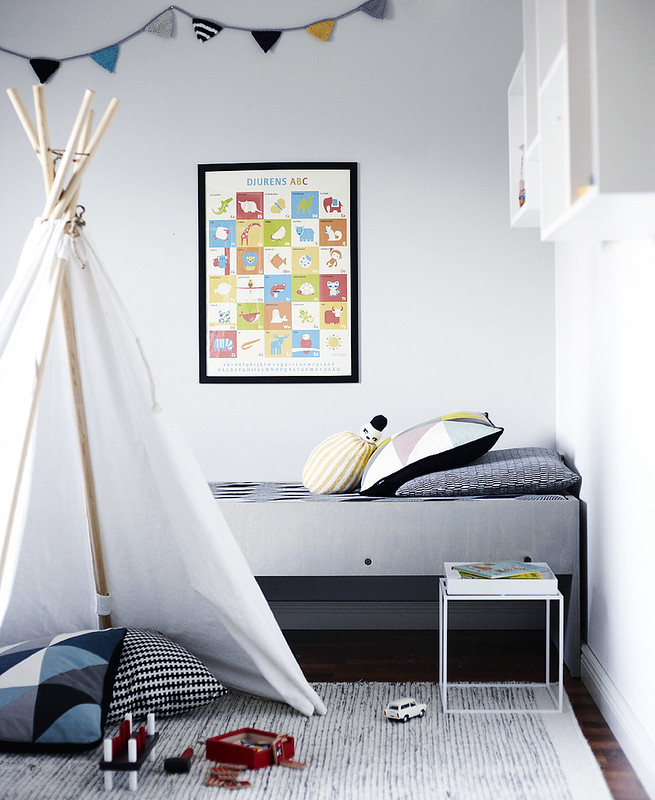
4. Set up a corner in your home where your children can read. It can be a simple as a pillow and a quilt next to a box of books. If you want to be more elaborate, though, find a theme that your child loves: princesses can read within the walls of a cardboard castle, pirates can cozy up inside an inflatable boat, and adventurous readers can camp out in a makeshift tent. There are tons of accessories that you can make or buy to complete the illusion.

5. Curtains aren't just for windows. Use them to cover bookshelves or cubbies, an open space under a sink or desk, or a closet without a door. You can hang them on either a length of heavy cord or a tension curtain rod.

Image courtesy of Country Living

6. Closets make gorgeous home offices. You can find examples all over the internet, including here.


Notions Pouch

7. There are a million and one uses for a zipper pouch in any workspace. They can hold pens and pencils, business cards, office supplies, flash cards, white board markers, bookmarks, clothespins, scissors, activity cards... The list is endless.


So there are a few things to get you started. Now let's move on to the tutorial part of the post: how to make your own photo desk blotter. I love having a place for pictures and notes on my desktop (that photo, by the way, is from the day when my mom introduced me to my new baby sister), and it's great to be able to keep them in something that's handmade. This is a surprisingly quick project -- I spent more time cutting out the pieces than I did doing the actual sewing. The plastic portion is actually quilting template plastic, but if you have another source for this type of material, you could definitely alter the dimensions on your blotter to make it larger.


Materials:
(1) 12 x 18" piece of template plastic (I use the Dritz template plastic which I find at my local Joann's. It seems to measure about 12.25 x 18.25" even though it's labeled as 12 x 18", but it will still fit.)
(8) 1.5" hexagons sewn together in two vertical rows of four
(2) 8 x 14" pieces of fabric for blotter ends
(2) 4 x 14" pieces of quilt batting for blotter ends
(2) 14 x 20" pieces of fabric for main body of blotter (You can use different prints for the top and bottom of your mat if you like -- they don't have to be the same material. I used a cotton print for my top and a linen solid for the bottom.)
(1) 14 x 20" piece of heavy sew-in interfacing for main body of blotter


1. Fold the fabric for the blotter ends in half lengthwise and press. Slip in the batting pieces and sew 1/4" from the fold on both pieces. Position one hexagon strip 3/4" from the top edge on the left blotter end, just along the 1/4" seam by the fold, and sew 1/16-1/8" just inside the hexagon strip all the way around. Repeat with the other blotter end except position the hexagon strip 3/4" from the bottom edge.


2. Layer in this order (bottom to top): sew-in interfacing, top main body blotter fabric (right side up), mat end pieces (in place on either side with folded edges pointed toward center and raw edges matched up), bottom main body blotter fabric (right side down). Clip or pin them all together in a stack.


3. Sew 1/2" all the way around, leaving a gap for turning on the bottom edge in the space between the blotter ends. Trim the excess around the edges and corners and then turn the whole thing right side out, pushing out the corners with a chopstick. Fold the raw edges inside and press. Stitch 1/8" from the bottom and top edges on the main body piece only -- not on the blotter ends -- backstitching at both ends. Give it one last press, insert the template plastic, and you're done!


If you're not into hexagons, you can make this project without them. This is the version that I made for Bunny's desk. The blotter ends are a little wider here -- 5.5 x 13" instead of 4 x 14. I personally prefer the more narrow ends, but it works either way. This one also has an extra layer of quilt batting in the main body piece for a softer, thicker feel. Love those elephants by Nancy Wolff!


If you're absolutely crazy about hexagons, this is a version I made for my sister with wide ends and three rows of 1 inch hexagons. I had so much fun sewing all those little hexies! Feel free to adapt this tutorial to make it the way you want it -- there are always so many ways that you can tweak a project to suit your needs.


If you make a desk blotter of your own, please share a picture with us in the Flickr group! Tomorrow Kristy has a fantastic pattern to show you, and yes, there may be paper piecing involved. She'll also have a wonderful giveaway from Pink Chalk Fabrics, so be sure to head over there on Tuesday to get in on the fun!

Linking up to the Let's Get Acquainted Monday Link-up.

Monday, January 7, 2013

Sweetcakes Baking Party Set Tutorial


I'm so excited to be sharing a tutorial at Riley Blake Designs today! When they asked me to look at their new fabric lines for inspiration, I was immediately taken with the new Sweetcakes collection by Doodlebug Design Inc. With prints that showcase strawberries, cupcakes, hearts, and flowers, it seemed like the perfect backdrop for a little girl's baking party. And since both Valentine's Day and my oldest daughter's birthday are coming up in February, I'm definitely on the lookout for new party ideas! You get plenty of bang for your buck with this one -- it's actual four tutorials in one, including...

The Party Bag

The Cake Bunting

The Cake Rug

The Apron

Hop on over to Riley Blake Designs, and check it out!

Linking up to Plum & June.

Friday, December 14, 2012

Feather Runner


When I started working on the feather quilt for my nieces using fabrics from Tula Pink's stunning Prince Charming collection, I made one large feather, roughly based on Anna Maria Horner's pattern. When it was finished, it looked a little thick for my taste, so I trimmed the sides...once, twice, three times. Each time, I found that the trimmed pieces could be put together to make a new feather by themselves. I ended up with three feathers for the quilt, and a spare which has now become a table runner that I adore.


I used a zig-zag stitch to applique it to a long piece of natural Essex linen. I quilted intermittent lines down the length of the piece, leaving the feather alone to make it stand out. The binding is linen too, so that all the focus will be on that strip of color in the center.


The runner is backed in a print by Joel Dewberry. It's just over forty-three inches long, so it will run through the entire center of our table, with just enough room for my mother and I to have our place settings at the ends.

The quilt for my nieces is still in progress. I finished the top and backing today, and I plan to have it quilted and bound by the end of the weekend. Hopefully I'll have pictures to share by Monday...

Have a lovely weekend!

Linking up to Crazy Mom Quilts.


Sunday, September 16, 2012

Sushi Plate Lunch Mat

Normally I'd be doing a Vintage Holiday Quilt post right now. Unfortunately I wasn't able to finish my quilt top until after dark, and I just couldn't bear to take an indoor picture of this one. Tomorrow morning I'll get a shot of it on the back patio and have a post for you before lunch, so be sure to check back. I'm so happy with how it turned out!


The incredibly talented Kristy of Quiet Play gave me the chance to test one of her upcoming paper piecing patterns: Sushi Plate. This is my third try at paper piecing, and I love it more each time I do it. This pattern was so much fun to put together.


I used the newspaper print from Maude Asbury's Crabtastic collection for the background. I love using text prints, and this one fit the theme so well that I had to include it somewhere. The rest of the block is made from scraps by Lizzy House, Cosmo Cricket, Violet Craft, Joel Dewberry, and Michael Miller. I added a border of grey linen to make it the right size for my husband to use it as a lunch mat at work in his classroom -- large enough for a plate but narrow enough to fit on the edge of his desk below the keyboard. The back is just a single piece of the orange Jewels print by Lizzy House which I used for the fish on the front. While the mat edges look slightly wonky in the first photo, they're actually straight -- not really sure what was going on there, but it was probably the linen acting up a bit for the camera.


This project was such a delight from start to finish.  Be sure to check Kristy's blog if you'd like to snag a pattern for yourself in the weeks ahead. I've come to enjoy pattern testing so much. If any of you are ever looking for someone to test a new pattern of yours, just send me an email at hjstaples@gmail.com. I'd love to help you out!

Linking up to Manic Monday, Let's Get Acquainted Monday Link-up, and the return (yippee!) of Sew Modern Monday.
Related Posts Plugin for WordPress, Blogger...